7.30.16 (7)

Prepping for Paint

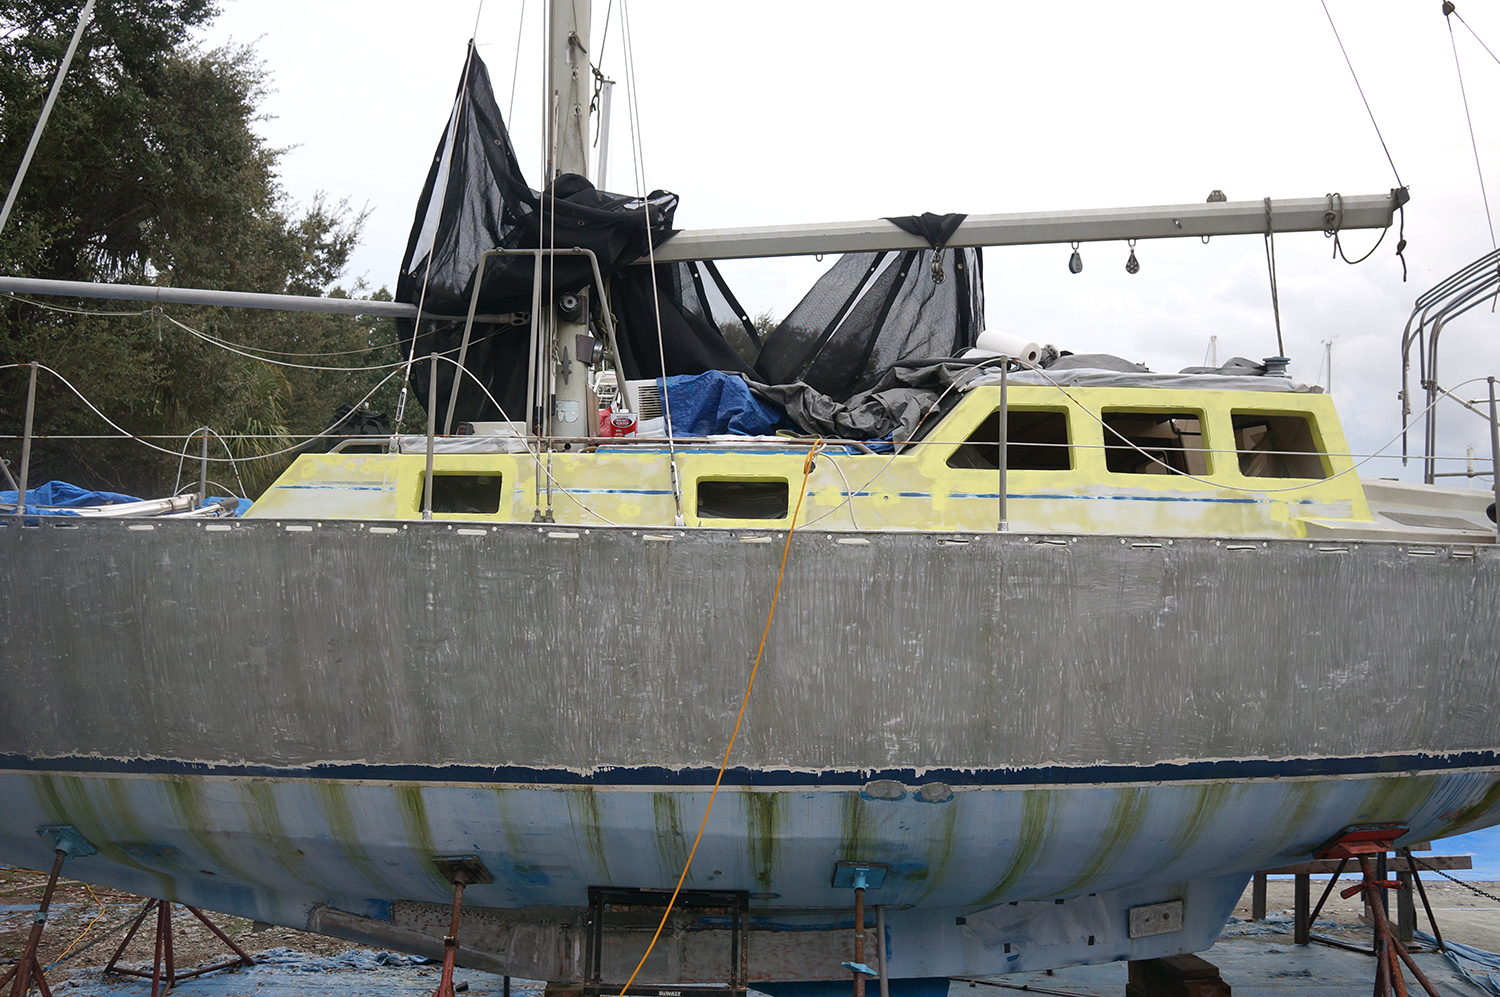
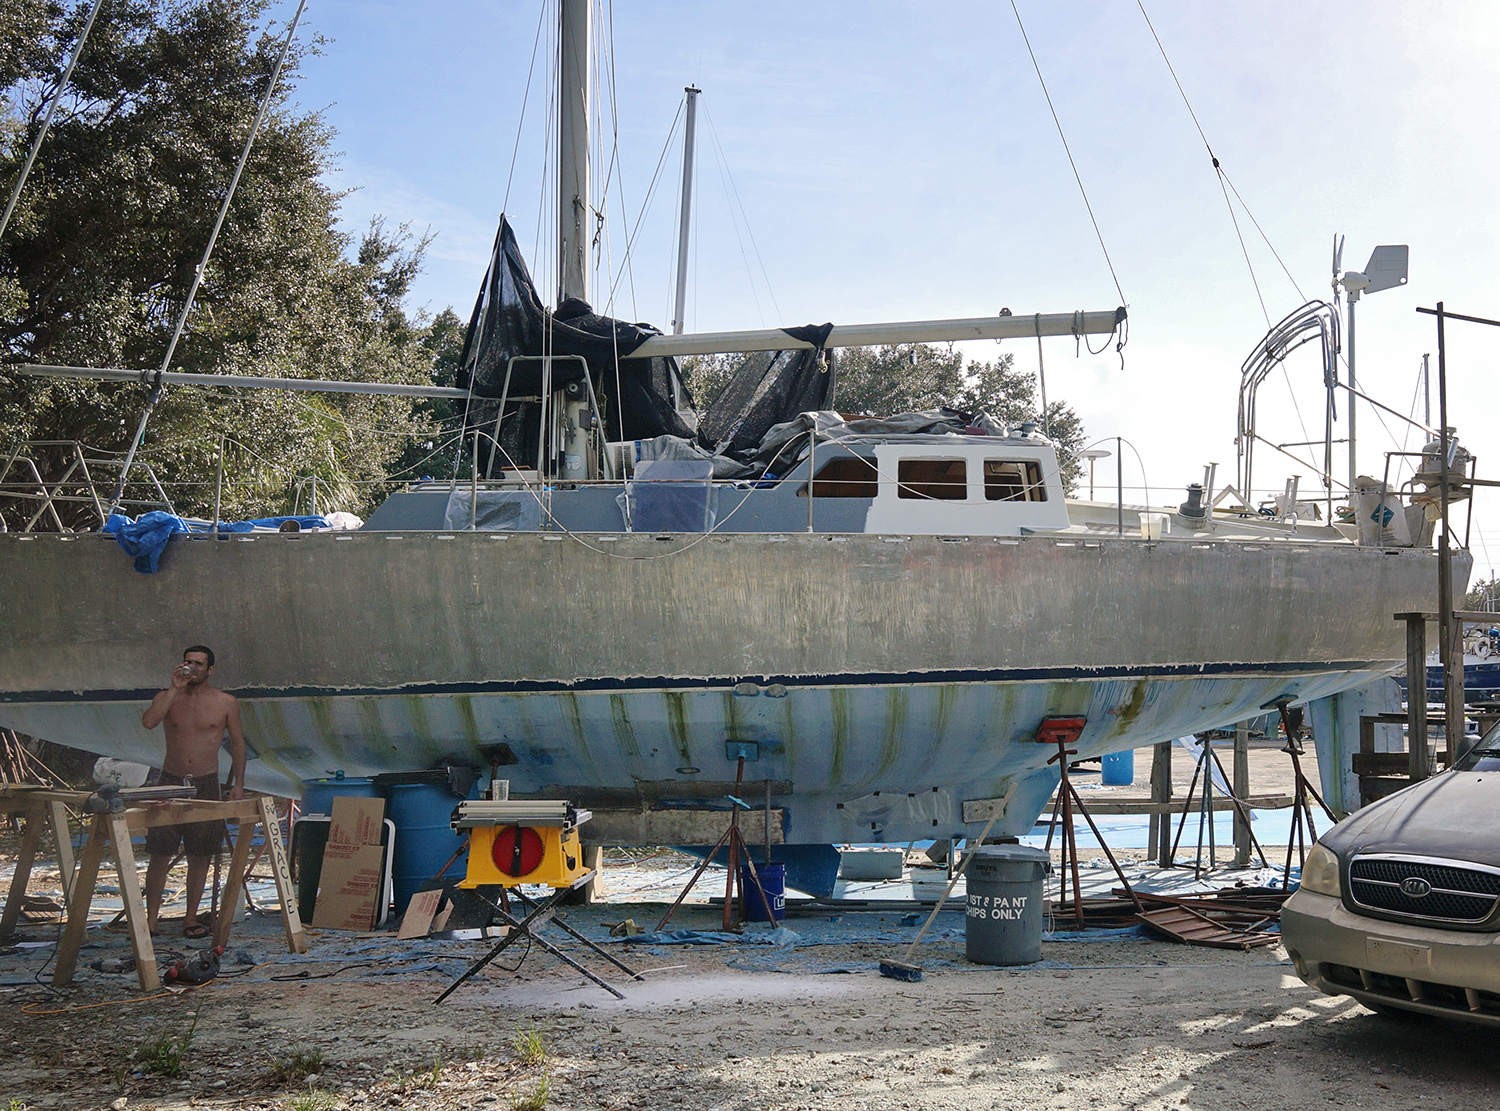
It never fails that as soon as we get a few walls new up, and I get excited and gung-ho to get a  nice white coat of paint on them, only to find that project is going to be pushed back about a week for other things first.  Not only that, it’s usually for one of my least favorite projects on earth.  Using filler, and then sanding that filler down. Some experts like top local exerior painters New Haven, can do an excellent job in this respect. However, it is fun to work with adhesive, smooth spreading and quality paints like evercoat ez ultra lite.

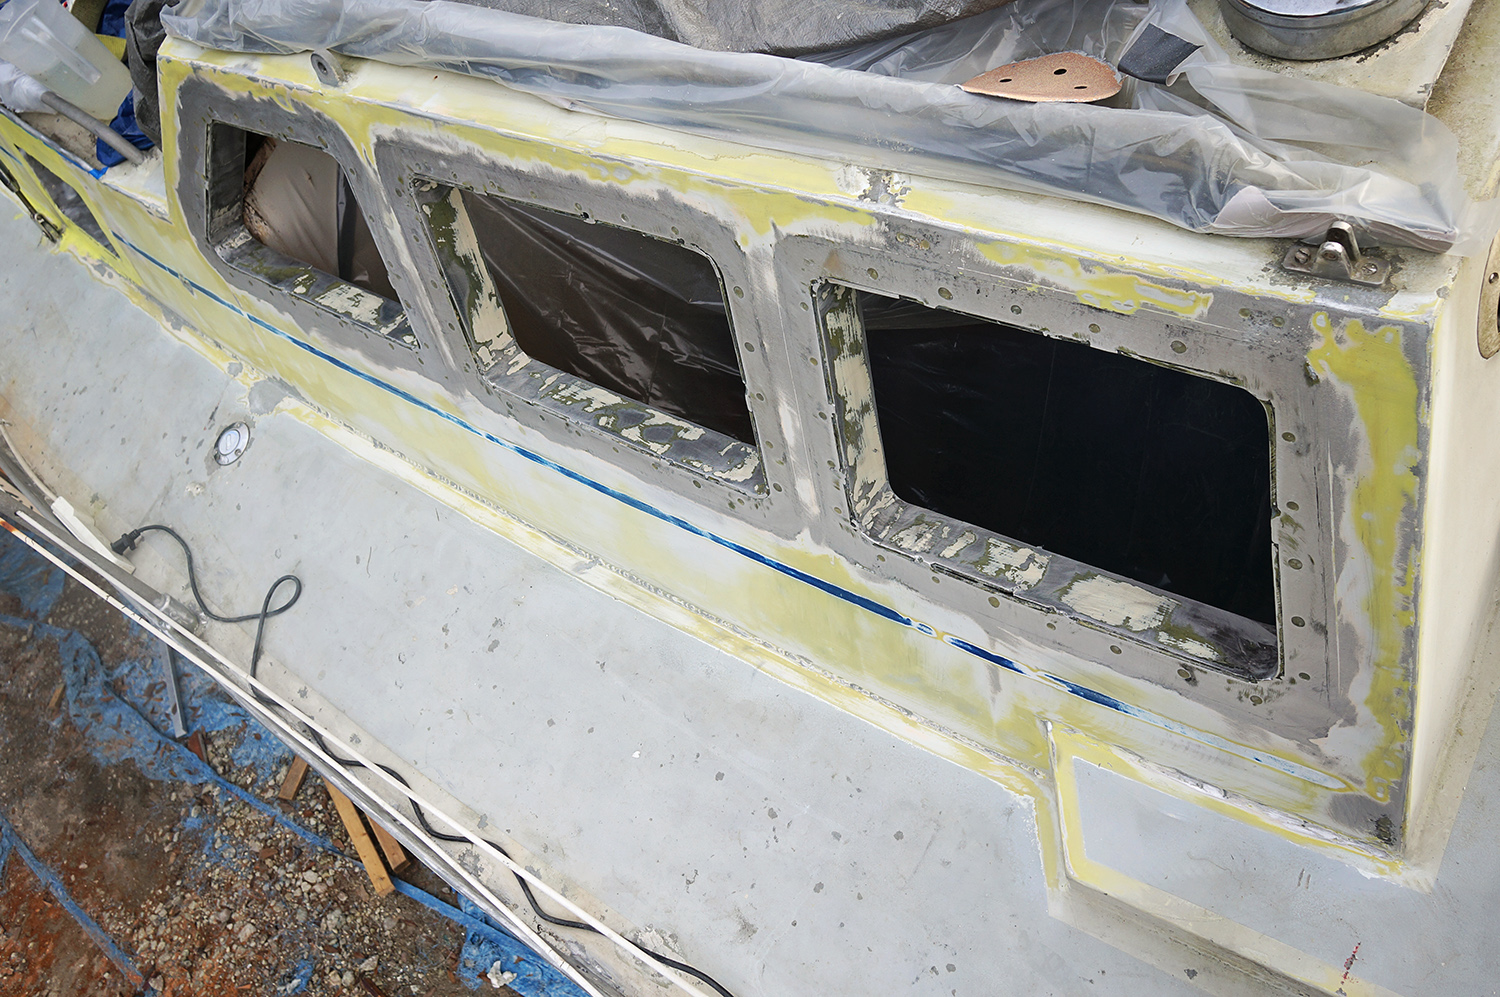
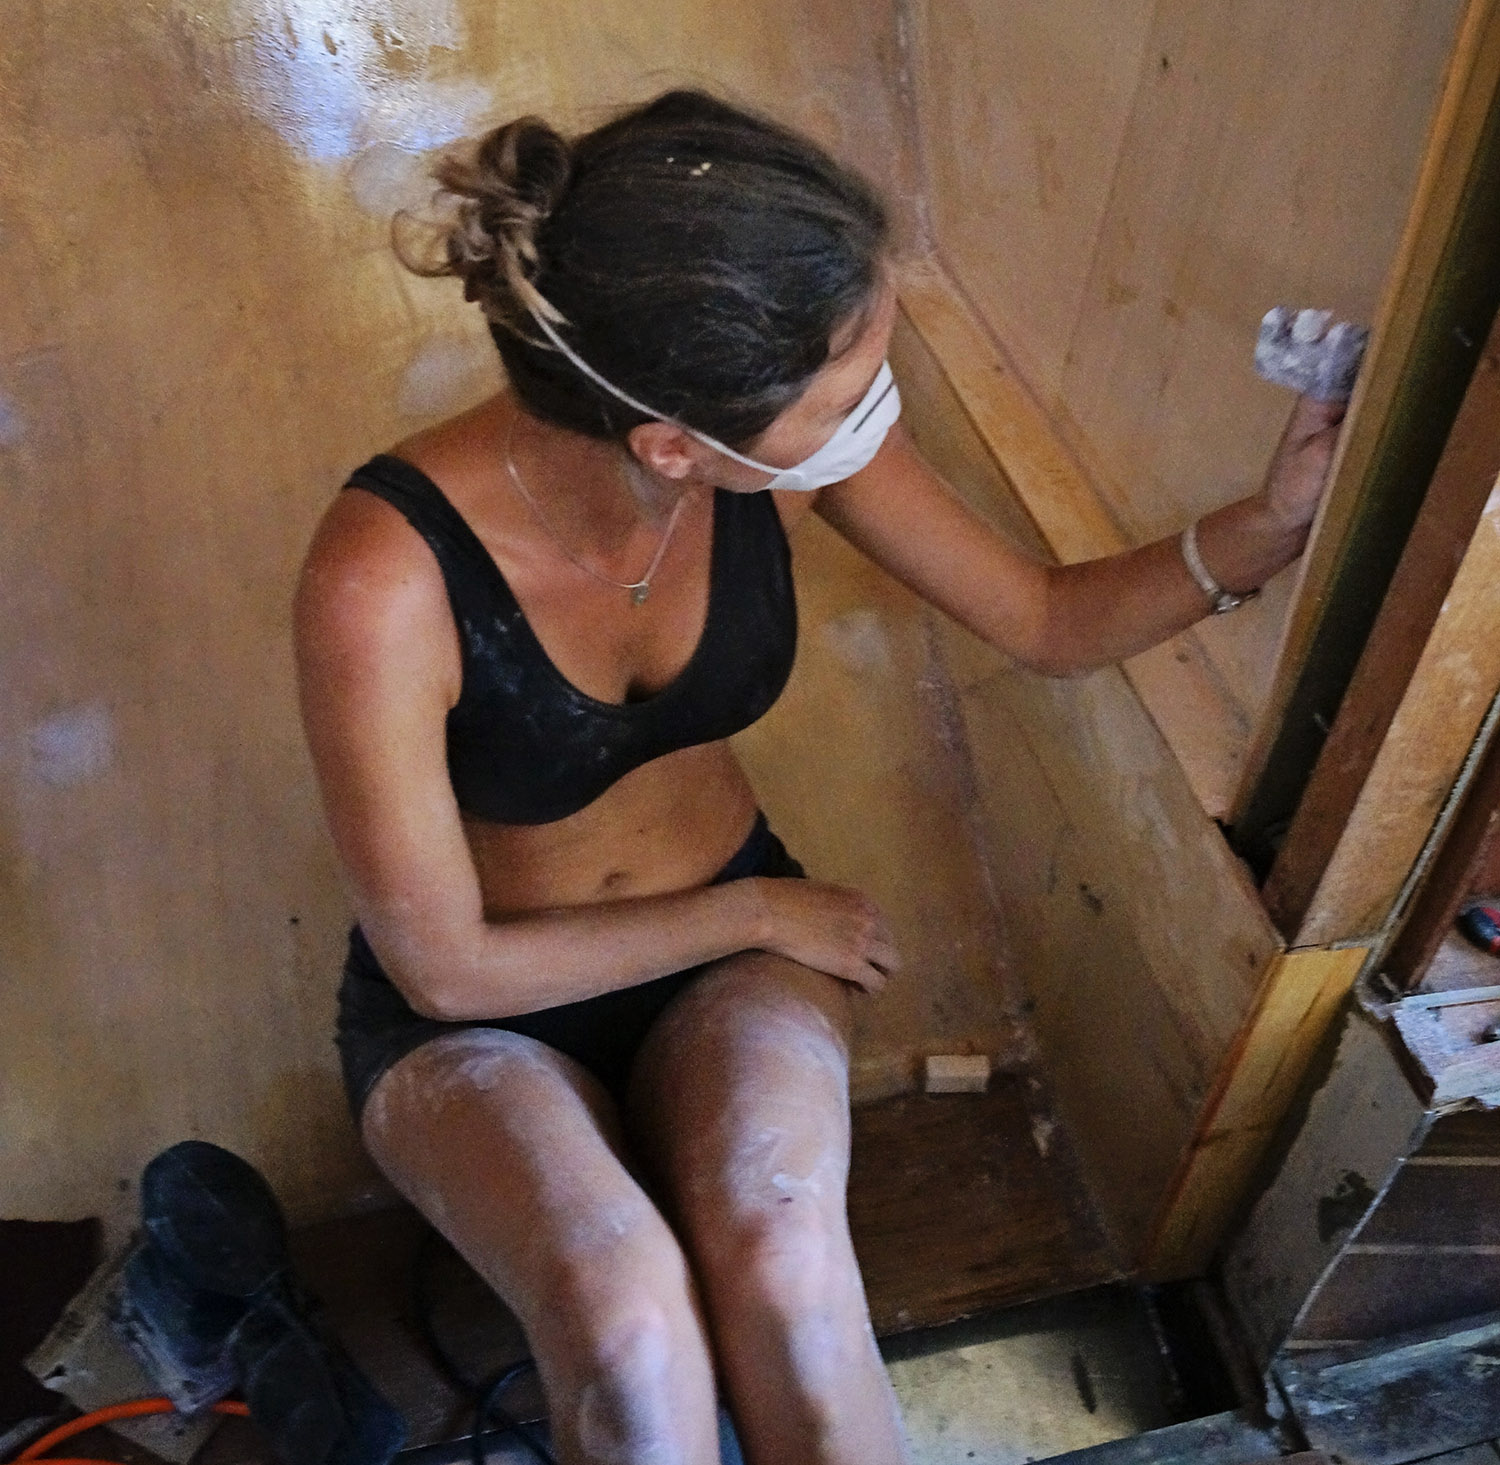
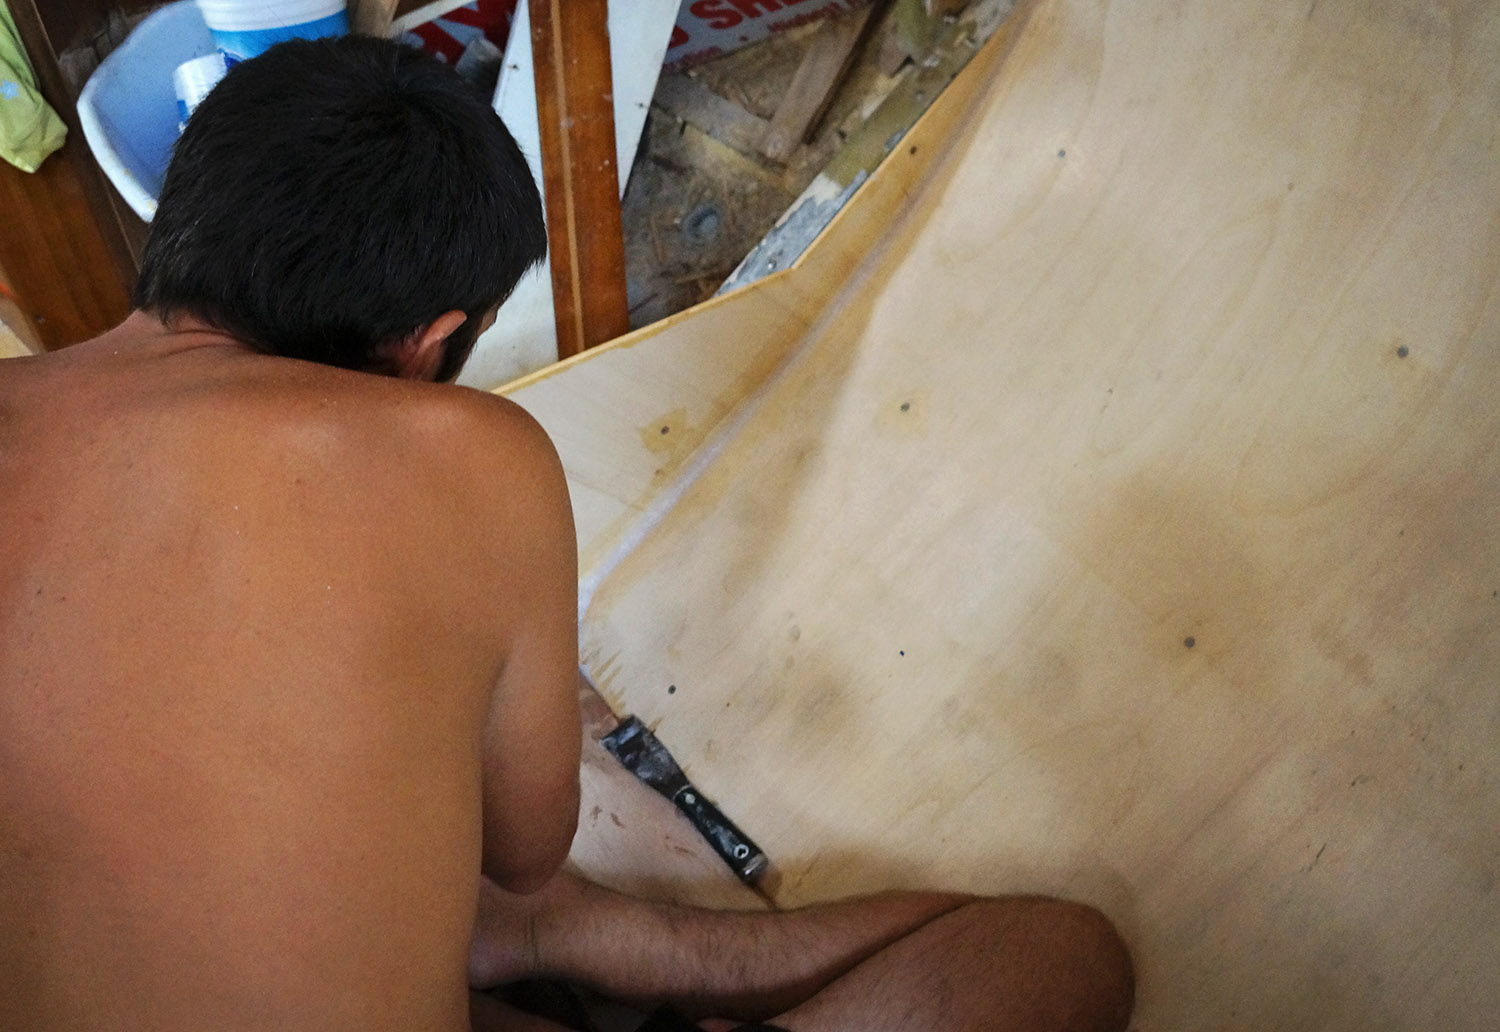
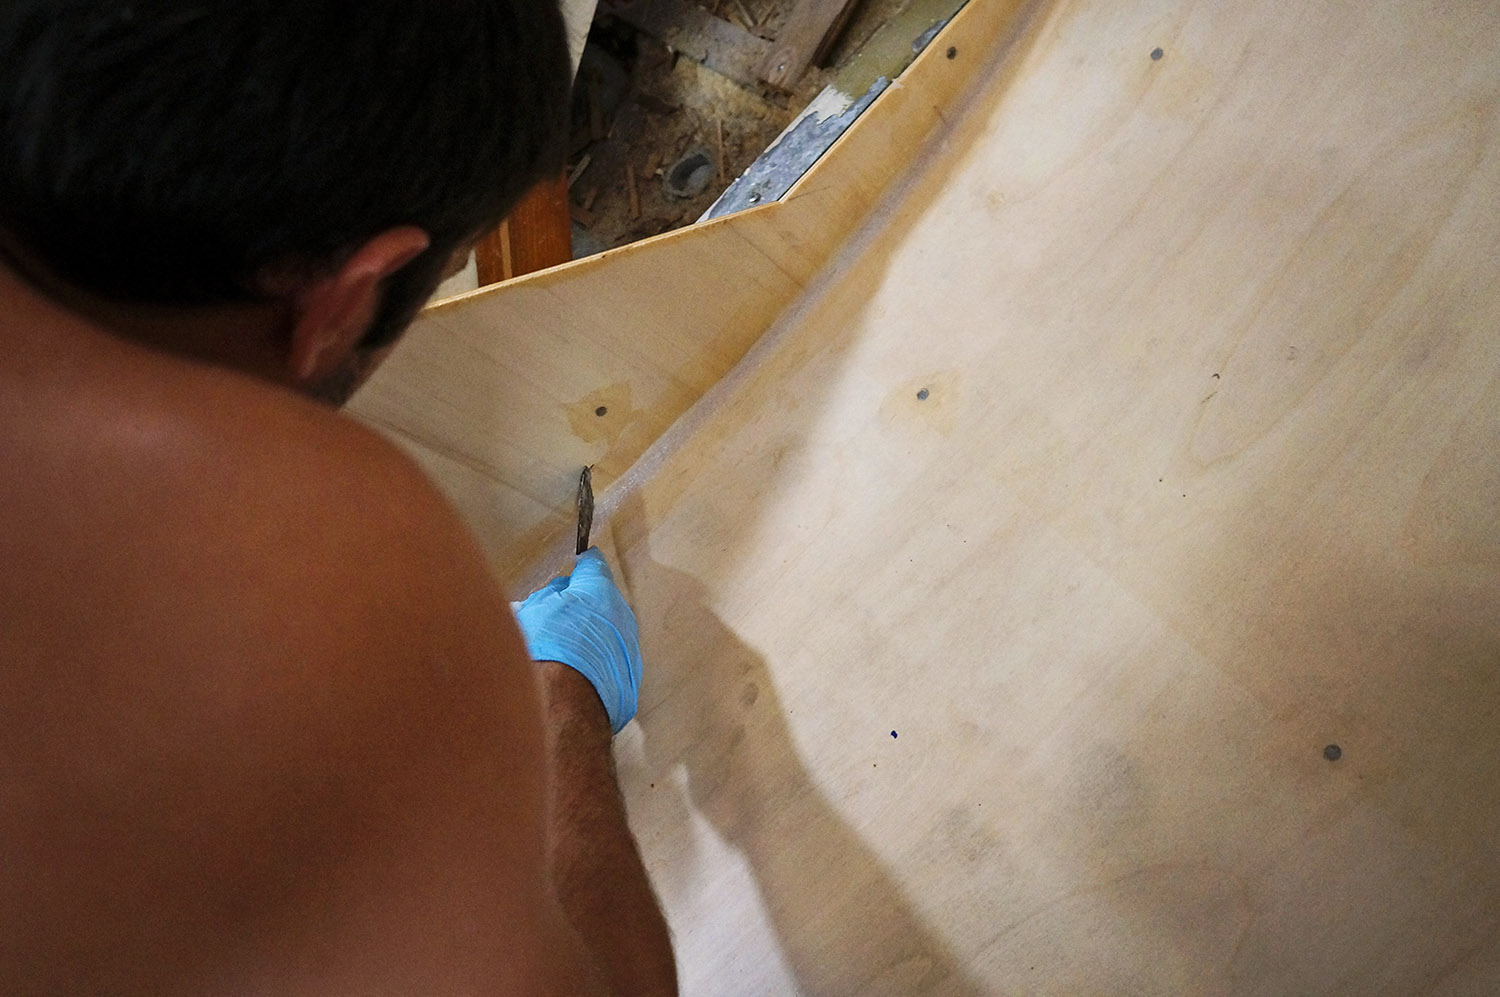
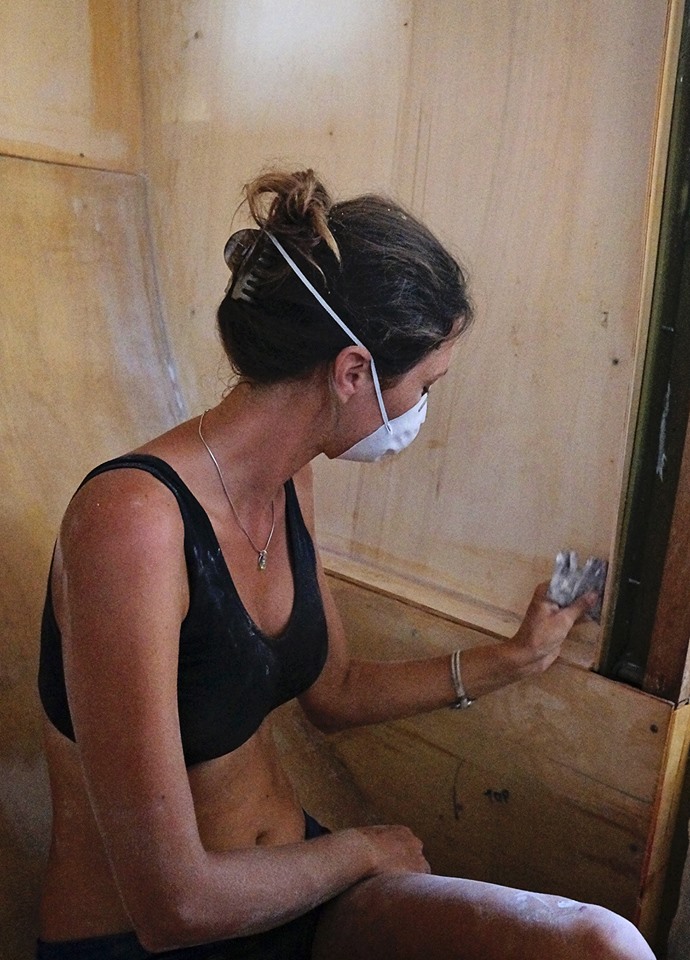
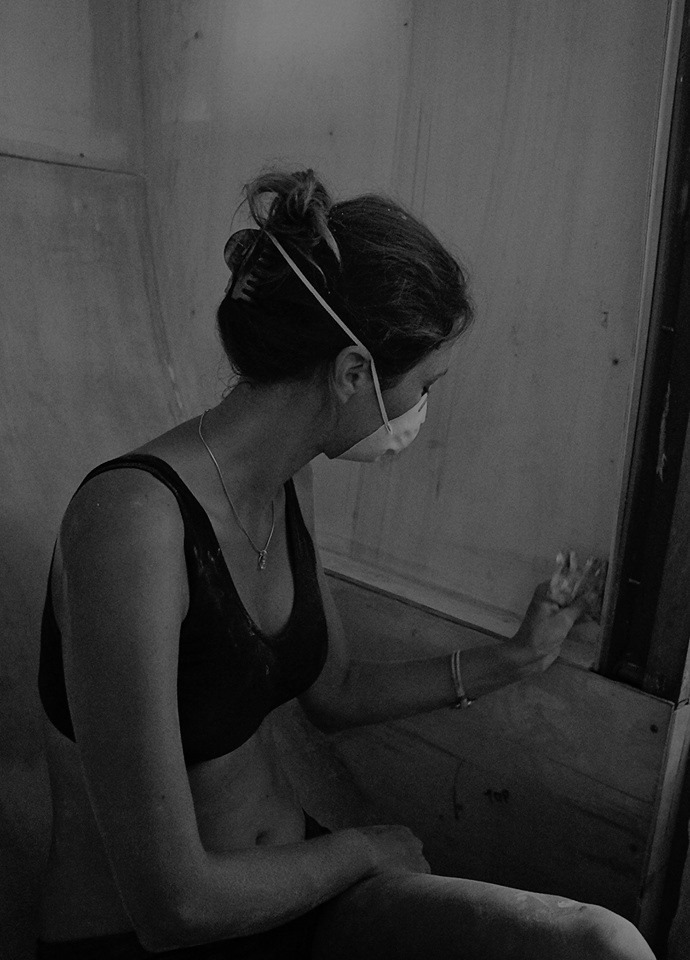
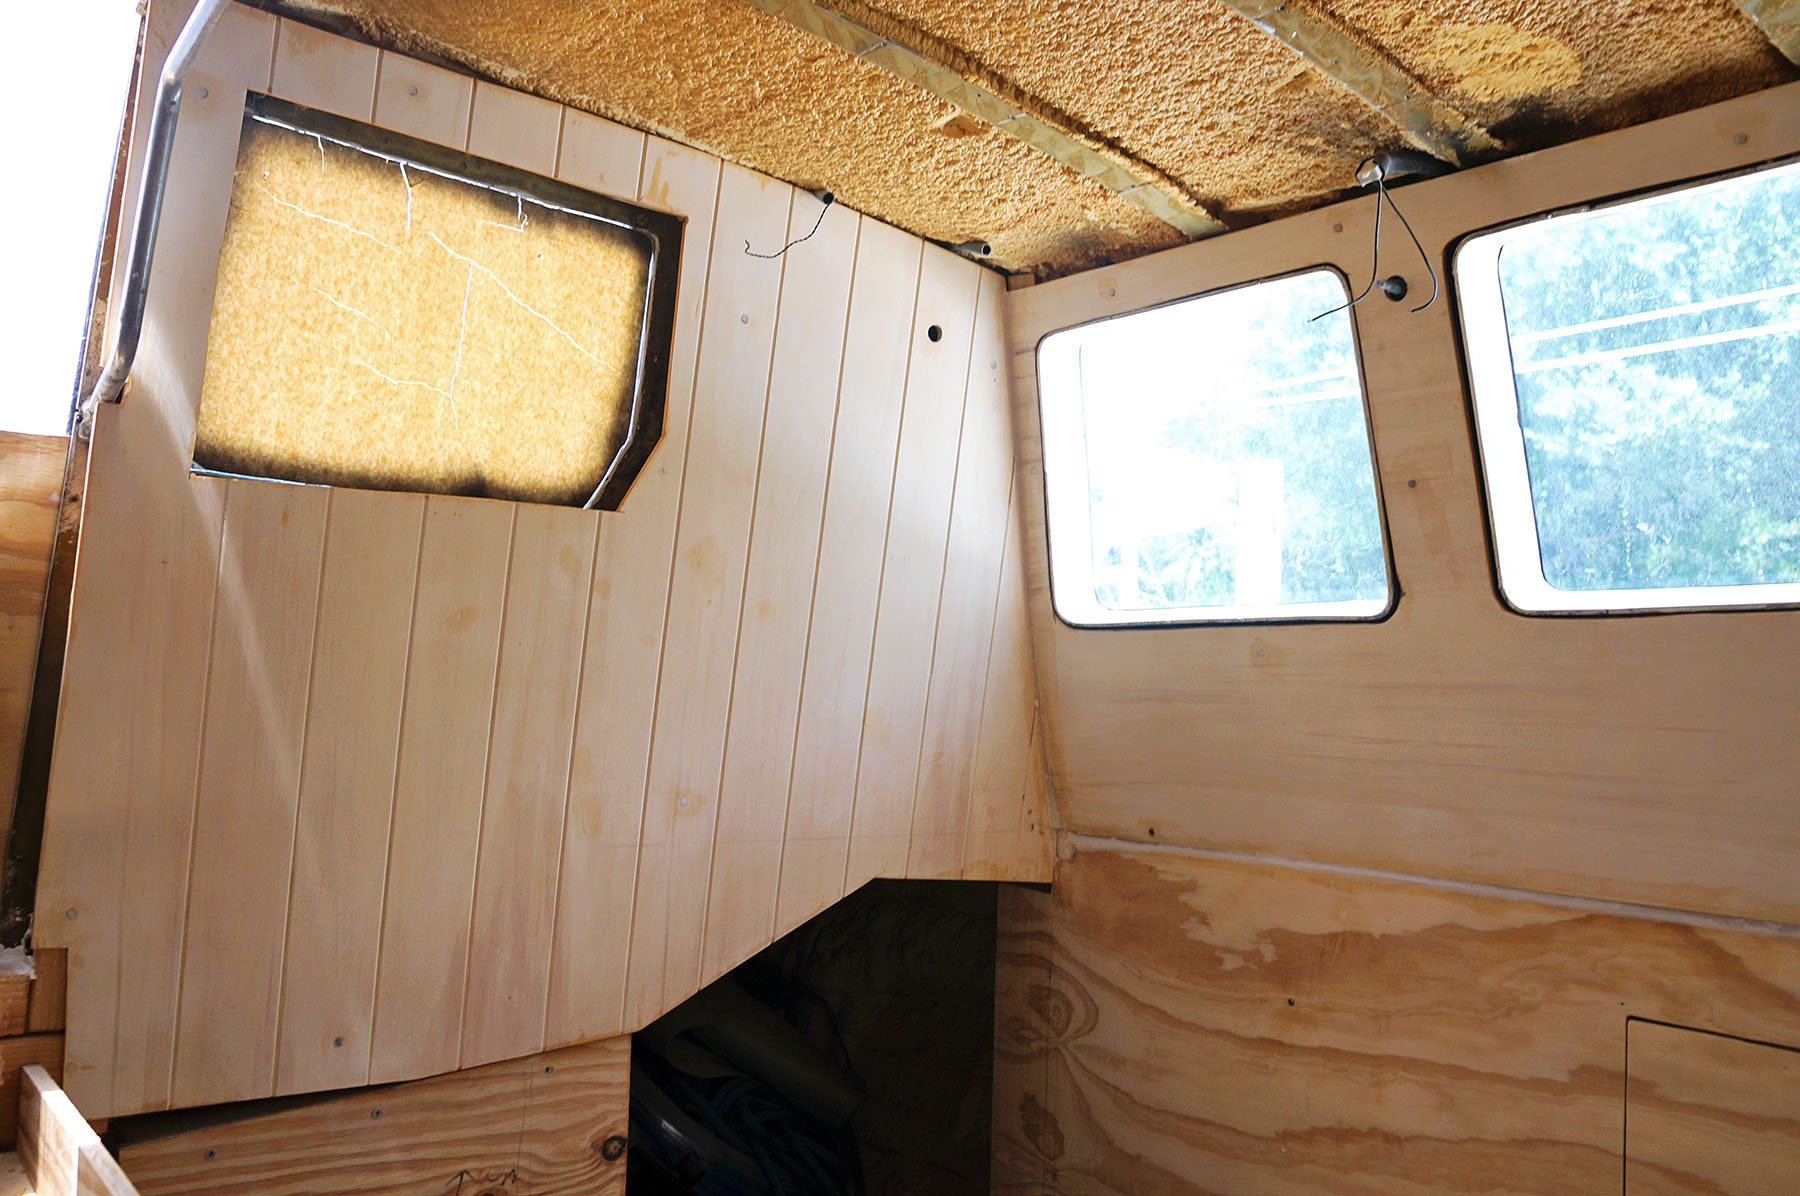
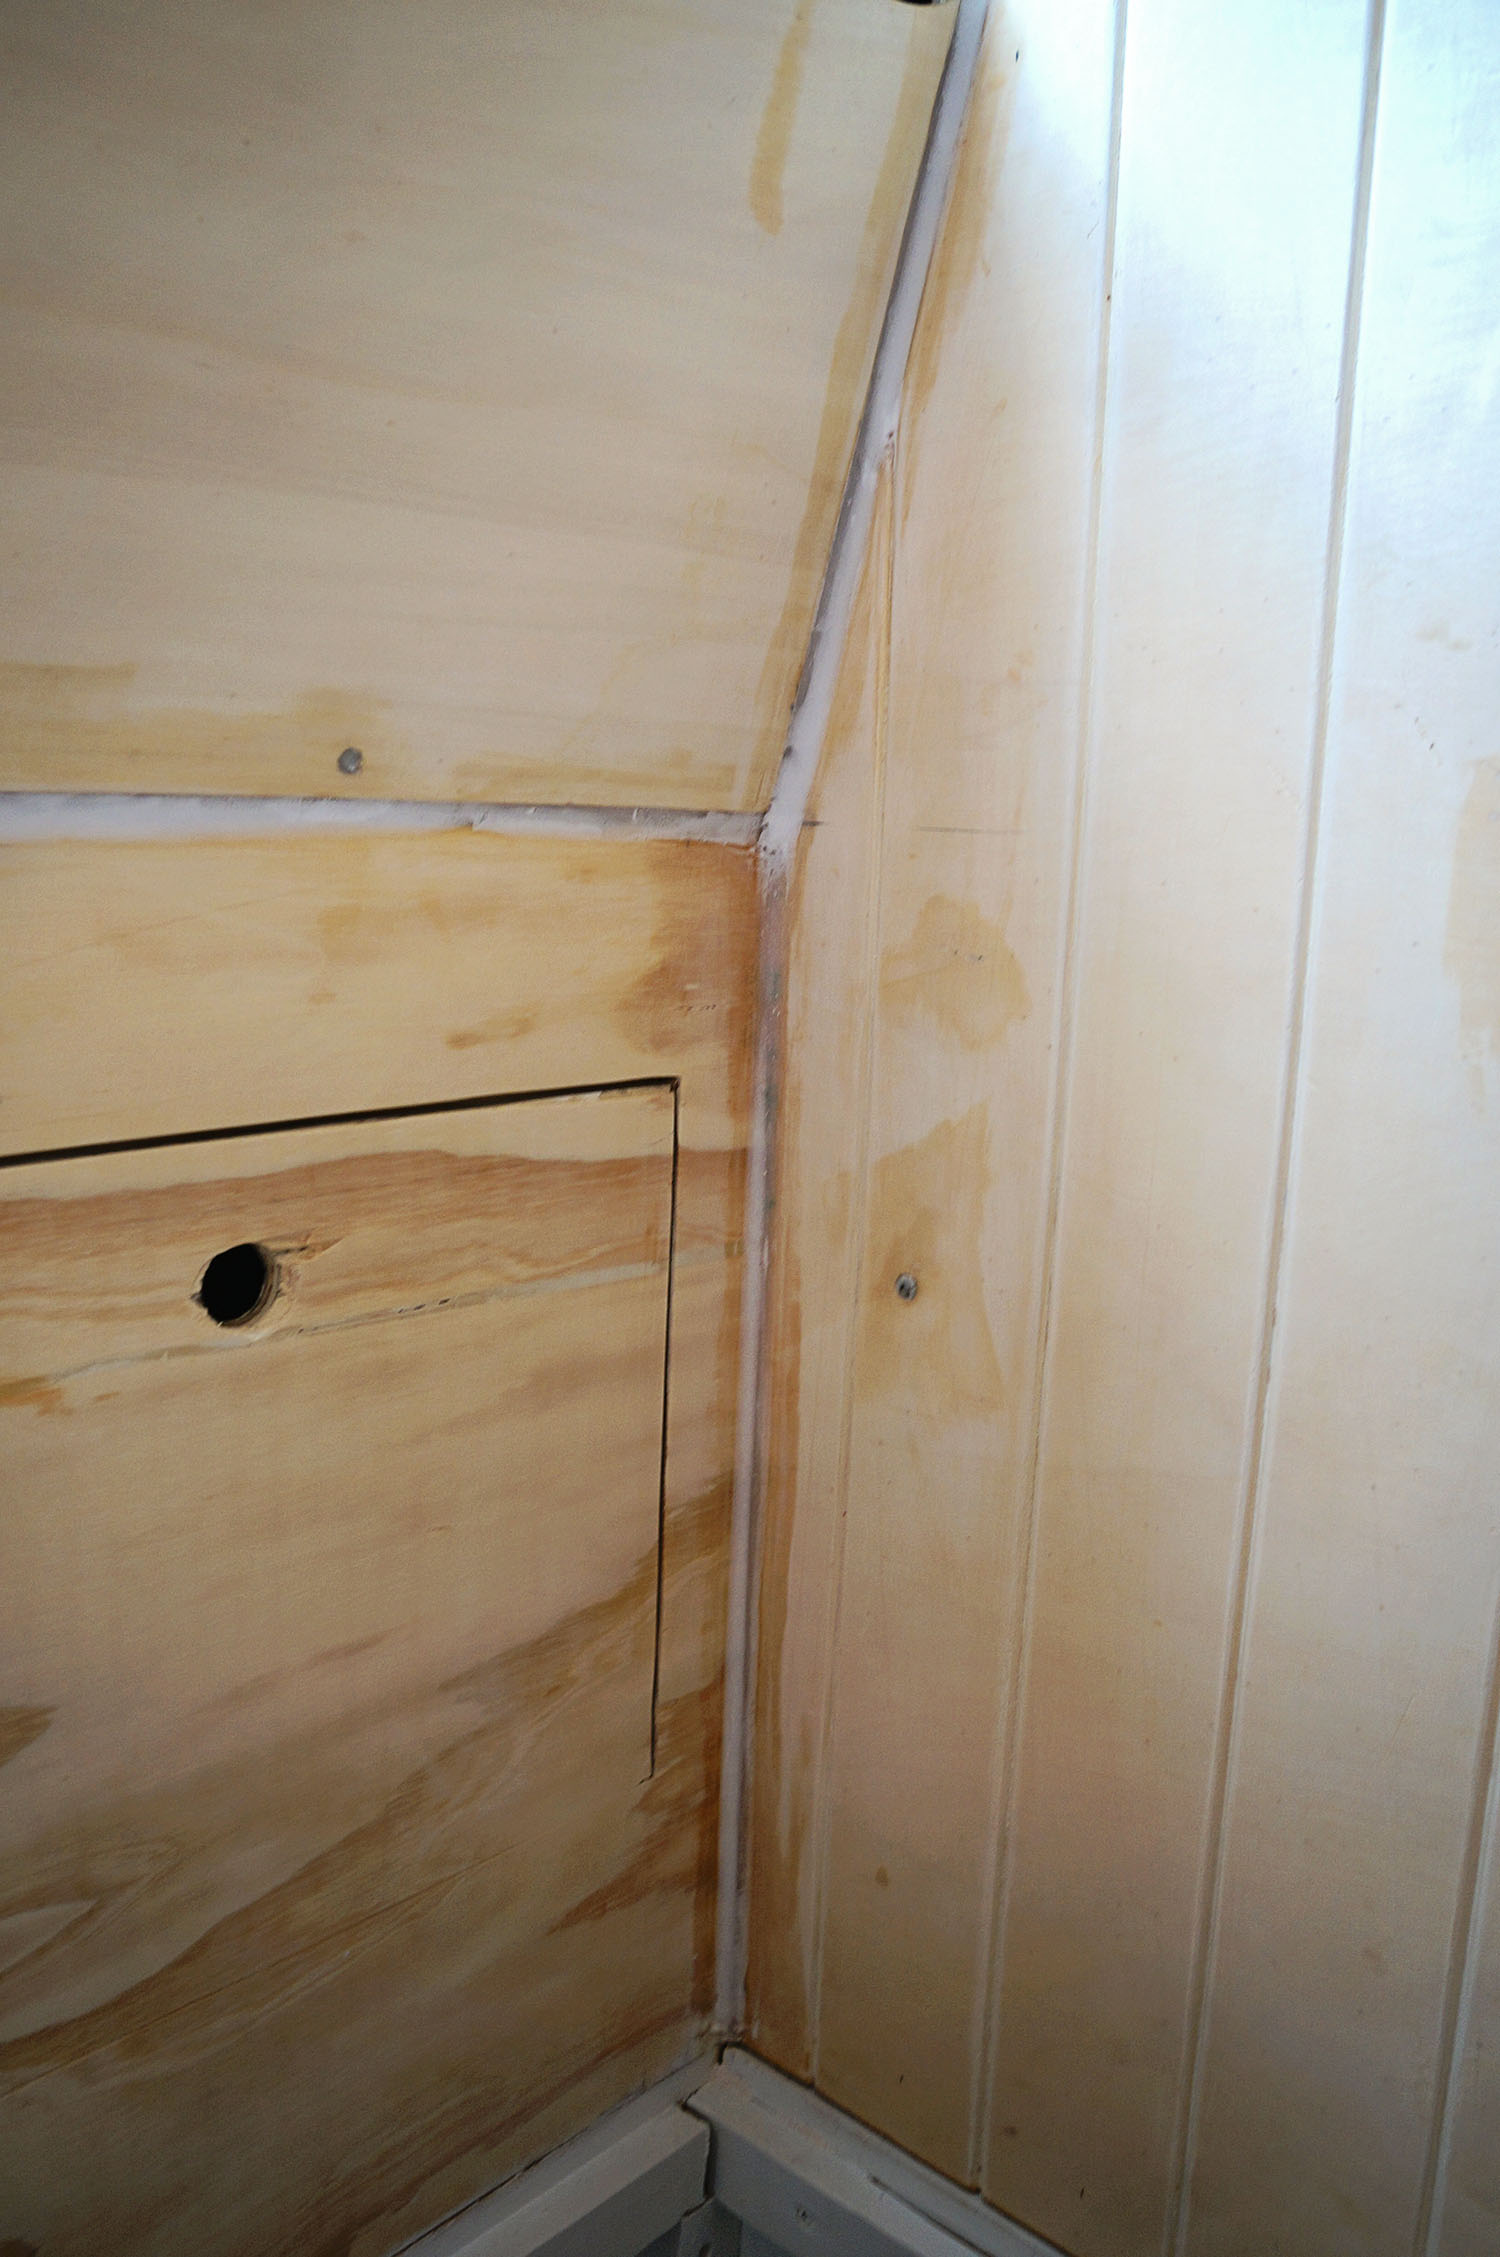
For all of our areas that are not overhead panels, basically meaning the ceiling, we would like them permanently fixed in the corners instead of solely using trim, and so we’v been stuffing them with an epoxy filler which then gets sanded down smooth.  And who gets to sand down these areas with peaks so hard and sharp they’ll slice open your finger if your hand skips off the sandpaper?  Ding ding ding, this girl here! However, before going through this process, it is important for customers to know How Much Does It Cost To Paint A Ceiling ?

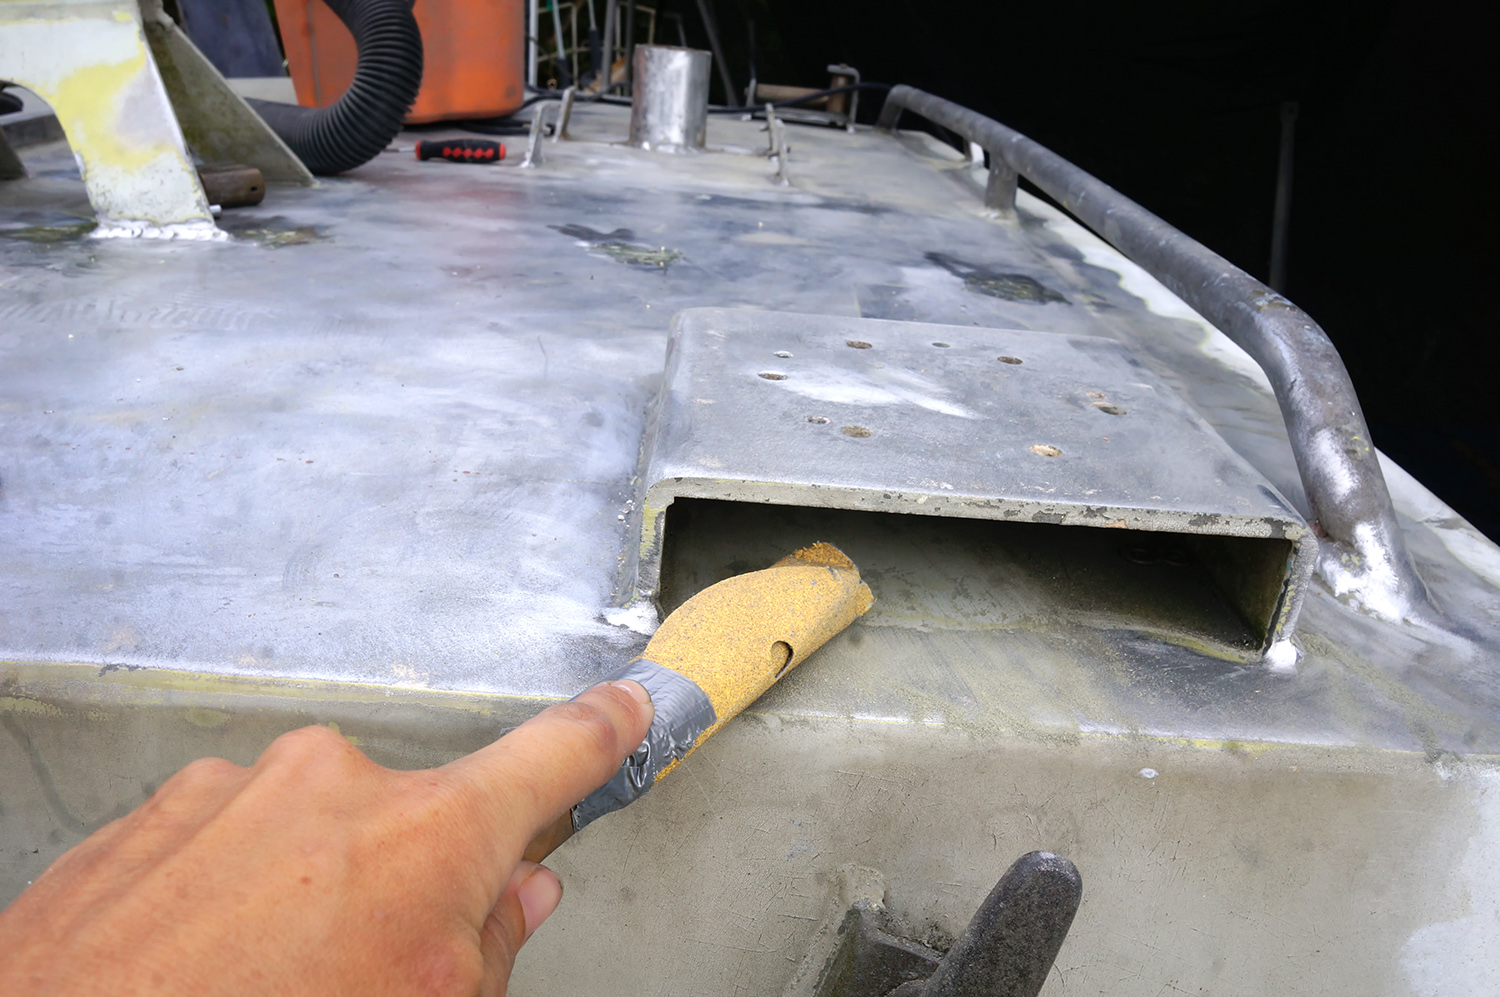
Ok, so this round in the pilot house wasn’t so bad because I was able to use  the palm sander for a good portion of it, and there were only a few corners that needed to be done by hand.  A Sharpie wrapped in sandpaper helped to do the trick in those areas, and for once I was left asking, “That was it?”.

Remember last fall when I had the horrible task of sanding all the seams inside the head?  At least these areas, for the most part, are a little easier to reach.

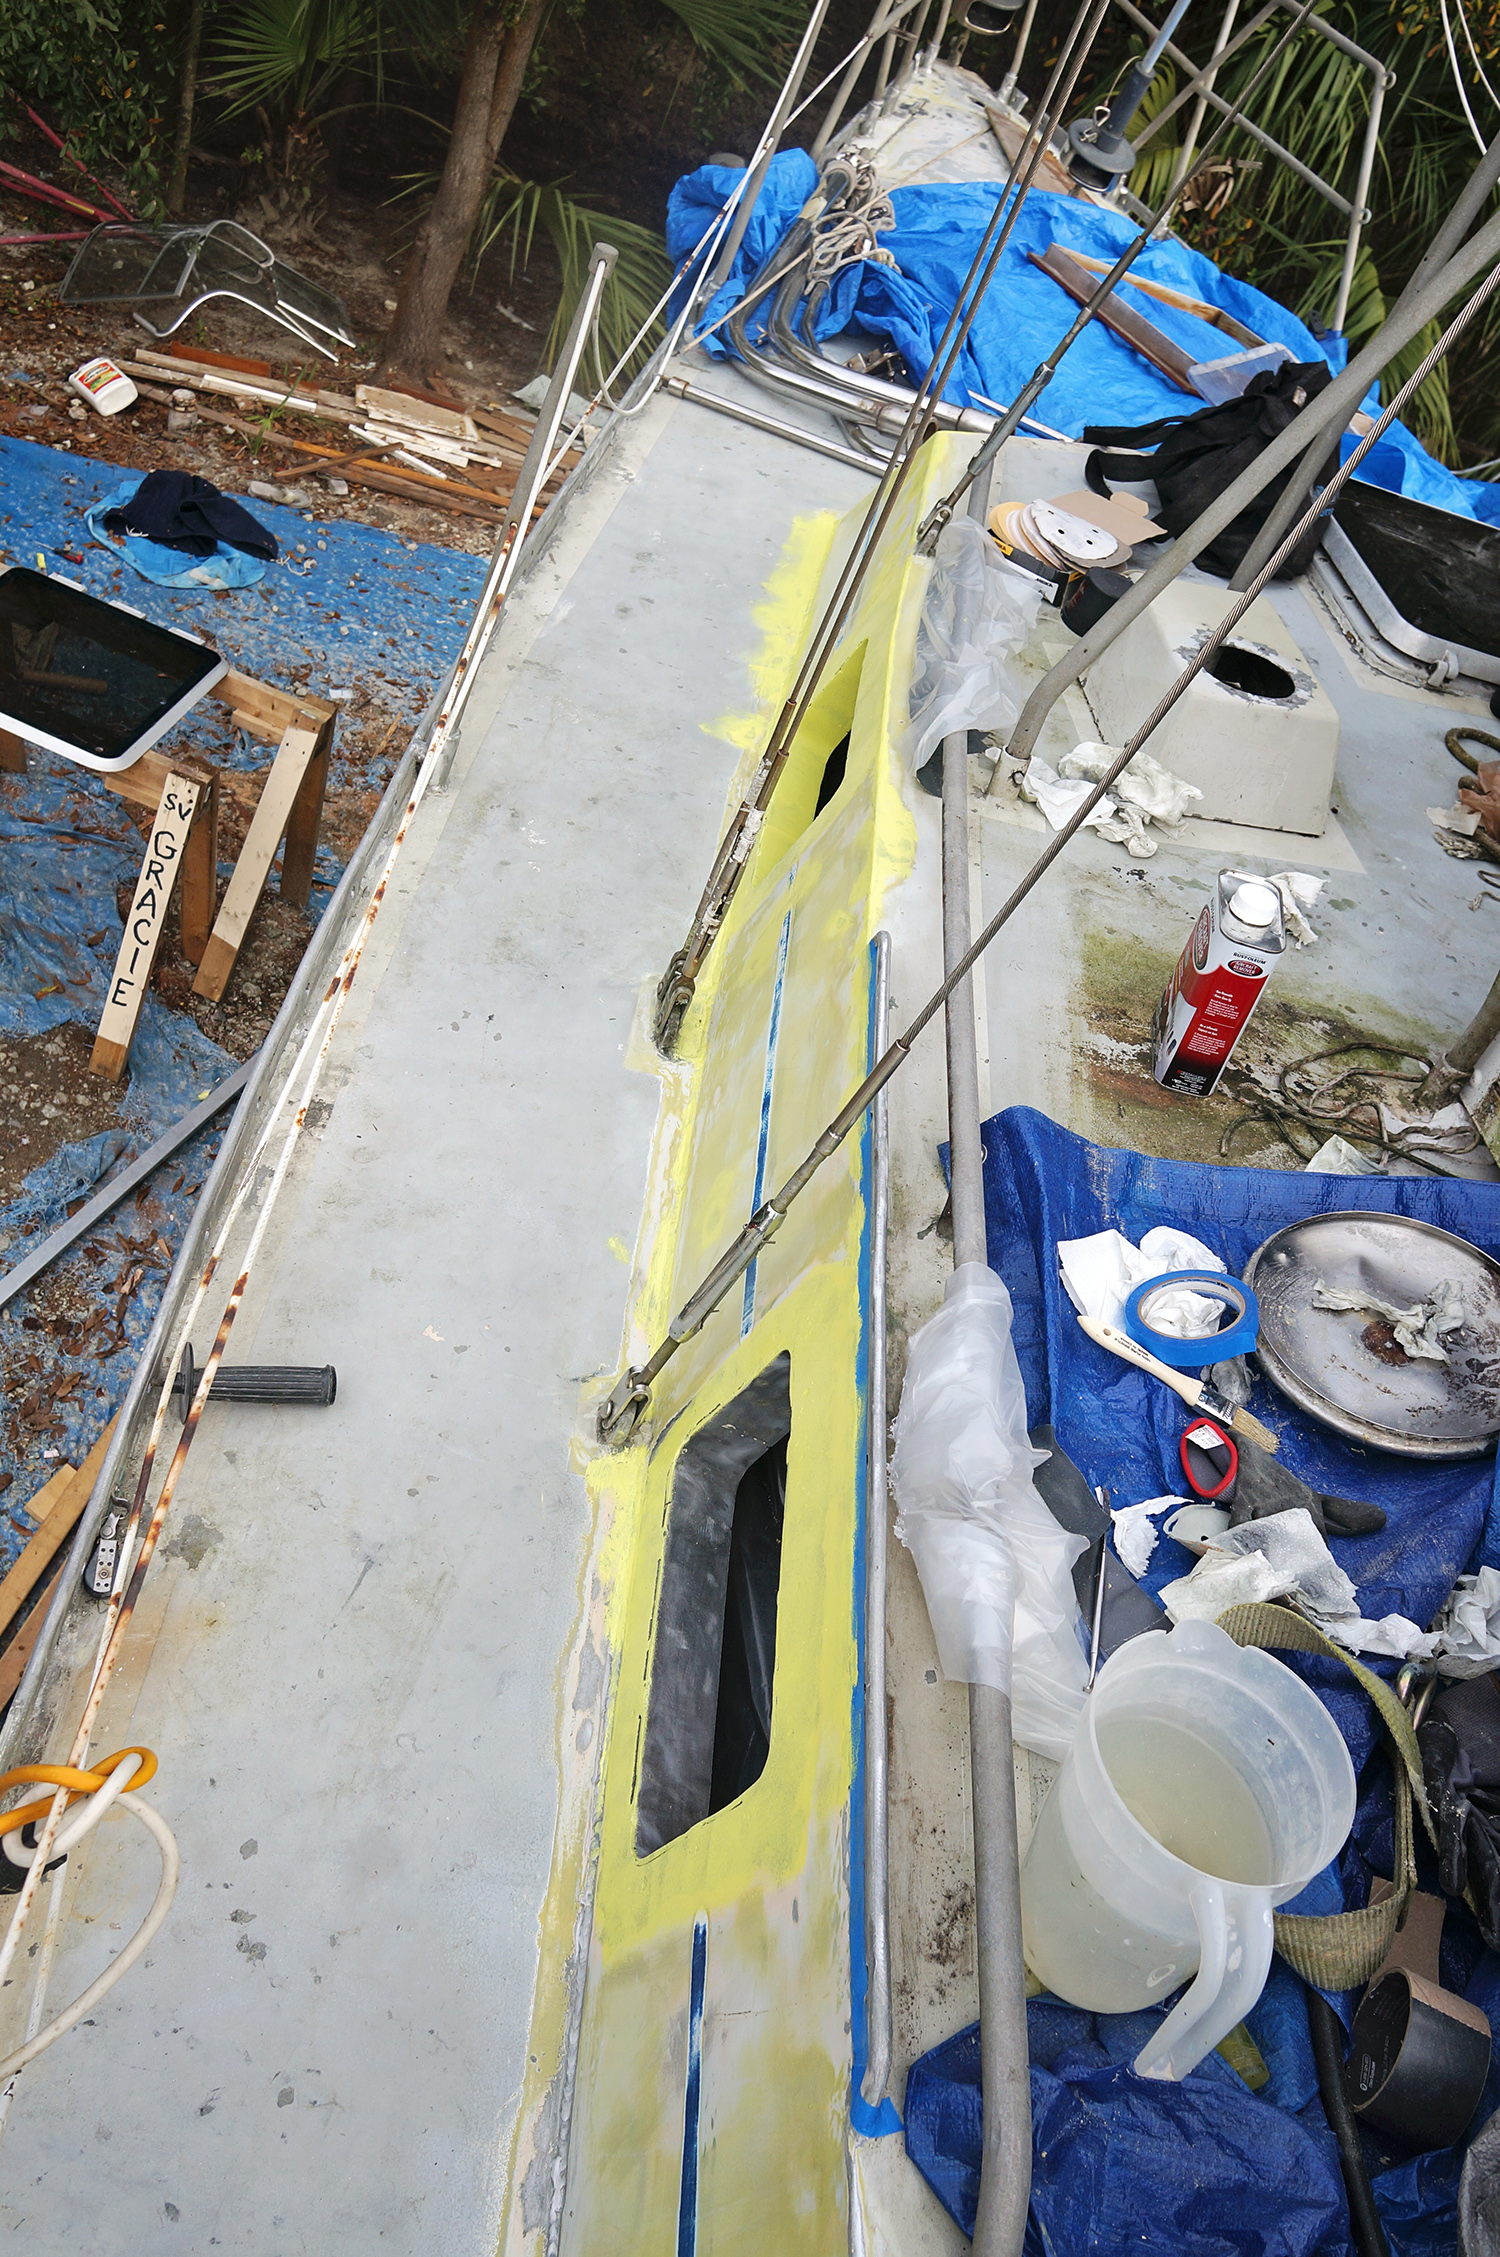
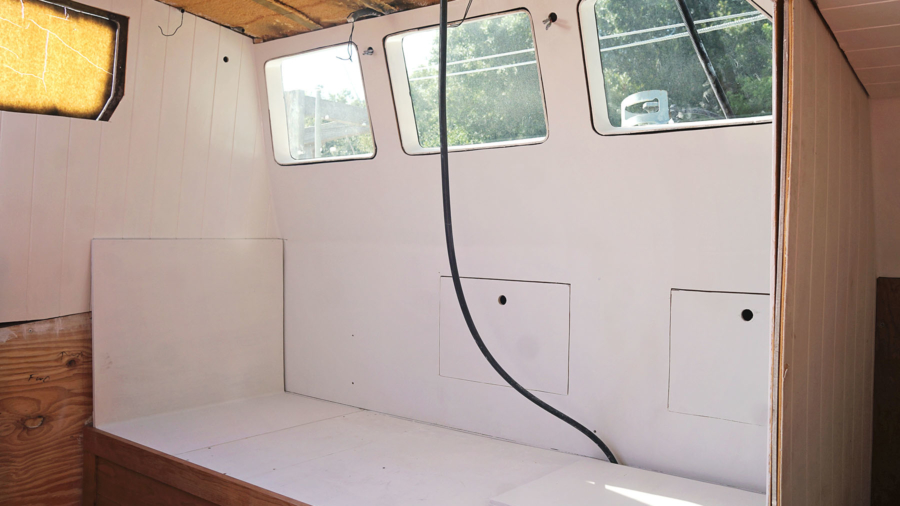
Taking the palm sander to the remaining boards to smooth down the surface for the initial priming, the job actually went by pretty quickly.  Sure there was another day added so we could go through and add a second filler that had better sanding qualities, covering the screw holes and any seams that may have had indents from the first round.  After about three days, I was let loose with my paint brush and hired Cincinnati Interior painters to finish the job.

7.30.16 (1)

7.30.16 (2)

7.30.16 (3)

7.30.16 (4)

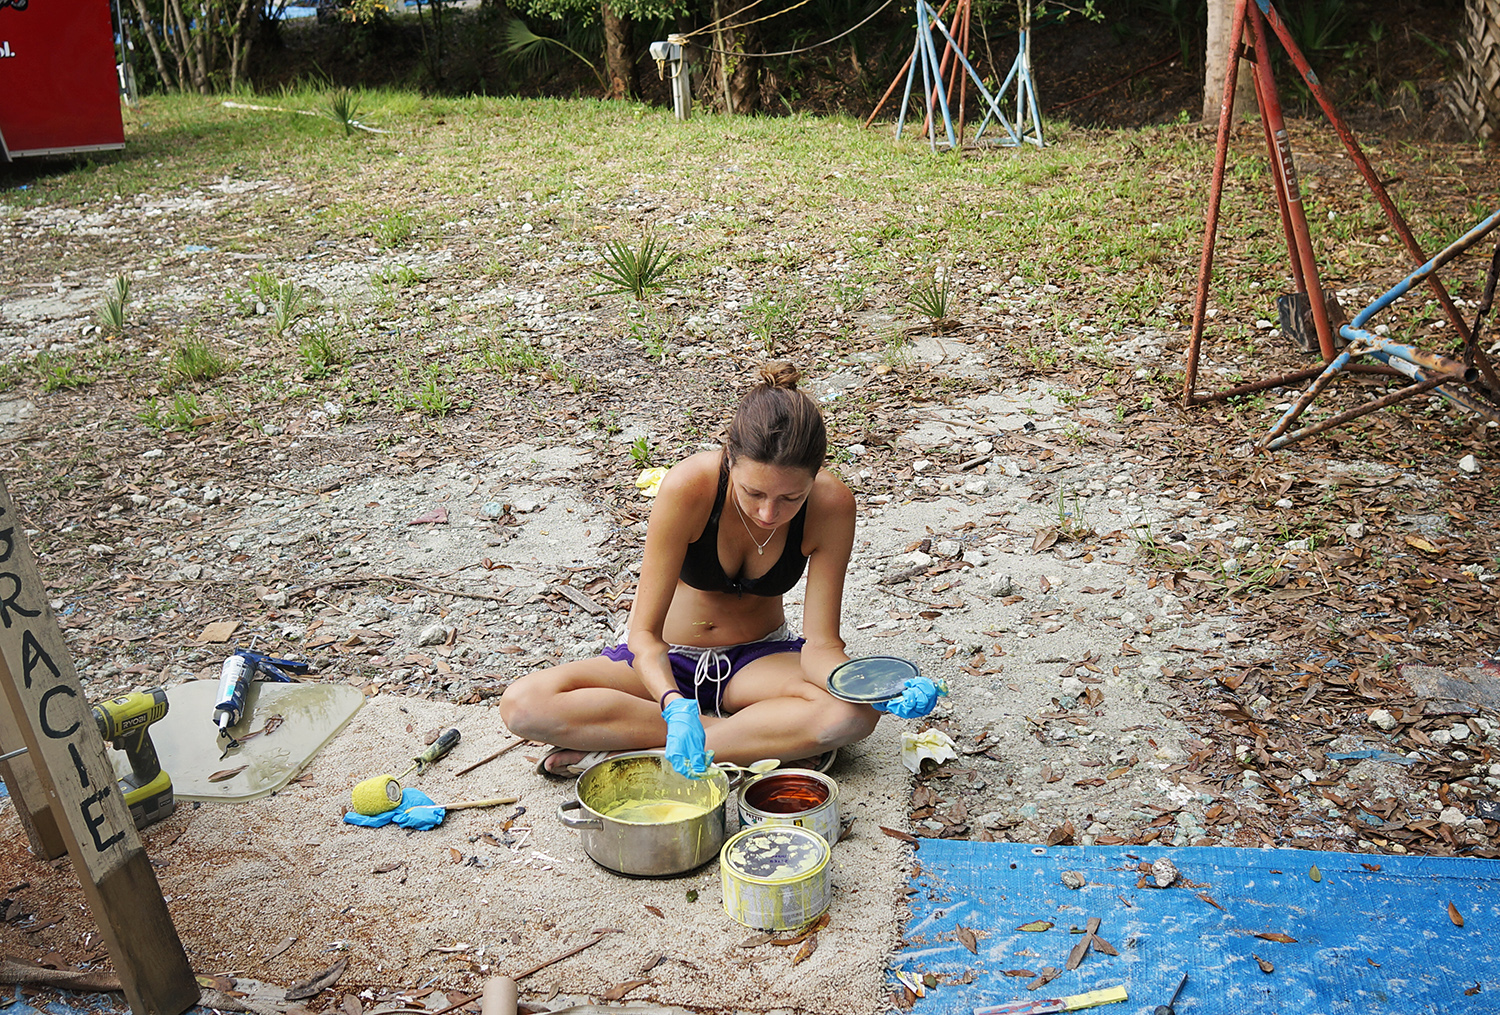
It was a long day, but I was able to get two coats of primer on all these boards in one work day.  Notice I say ‘work day’ because I will still throw in the towel at 5 pm even there is plenty of daylight left for working later.  I would say the next day where I did a hand sanding, as to not take of everything I’d just done with the palm sander, as well as put a coat of paint on a good day too, but I was suffering a massive wine hangover.  A side story that will be saved for a later post, but Will and Cat from Monday Never met up with us at the patio while they got ready to sell their boat Paradox, and after the few glasses of wine that Cat and I had, combined with the insufferable heat, and we both had headaches until 5 pm the next day.

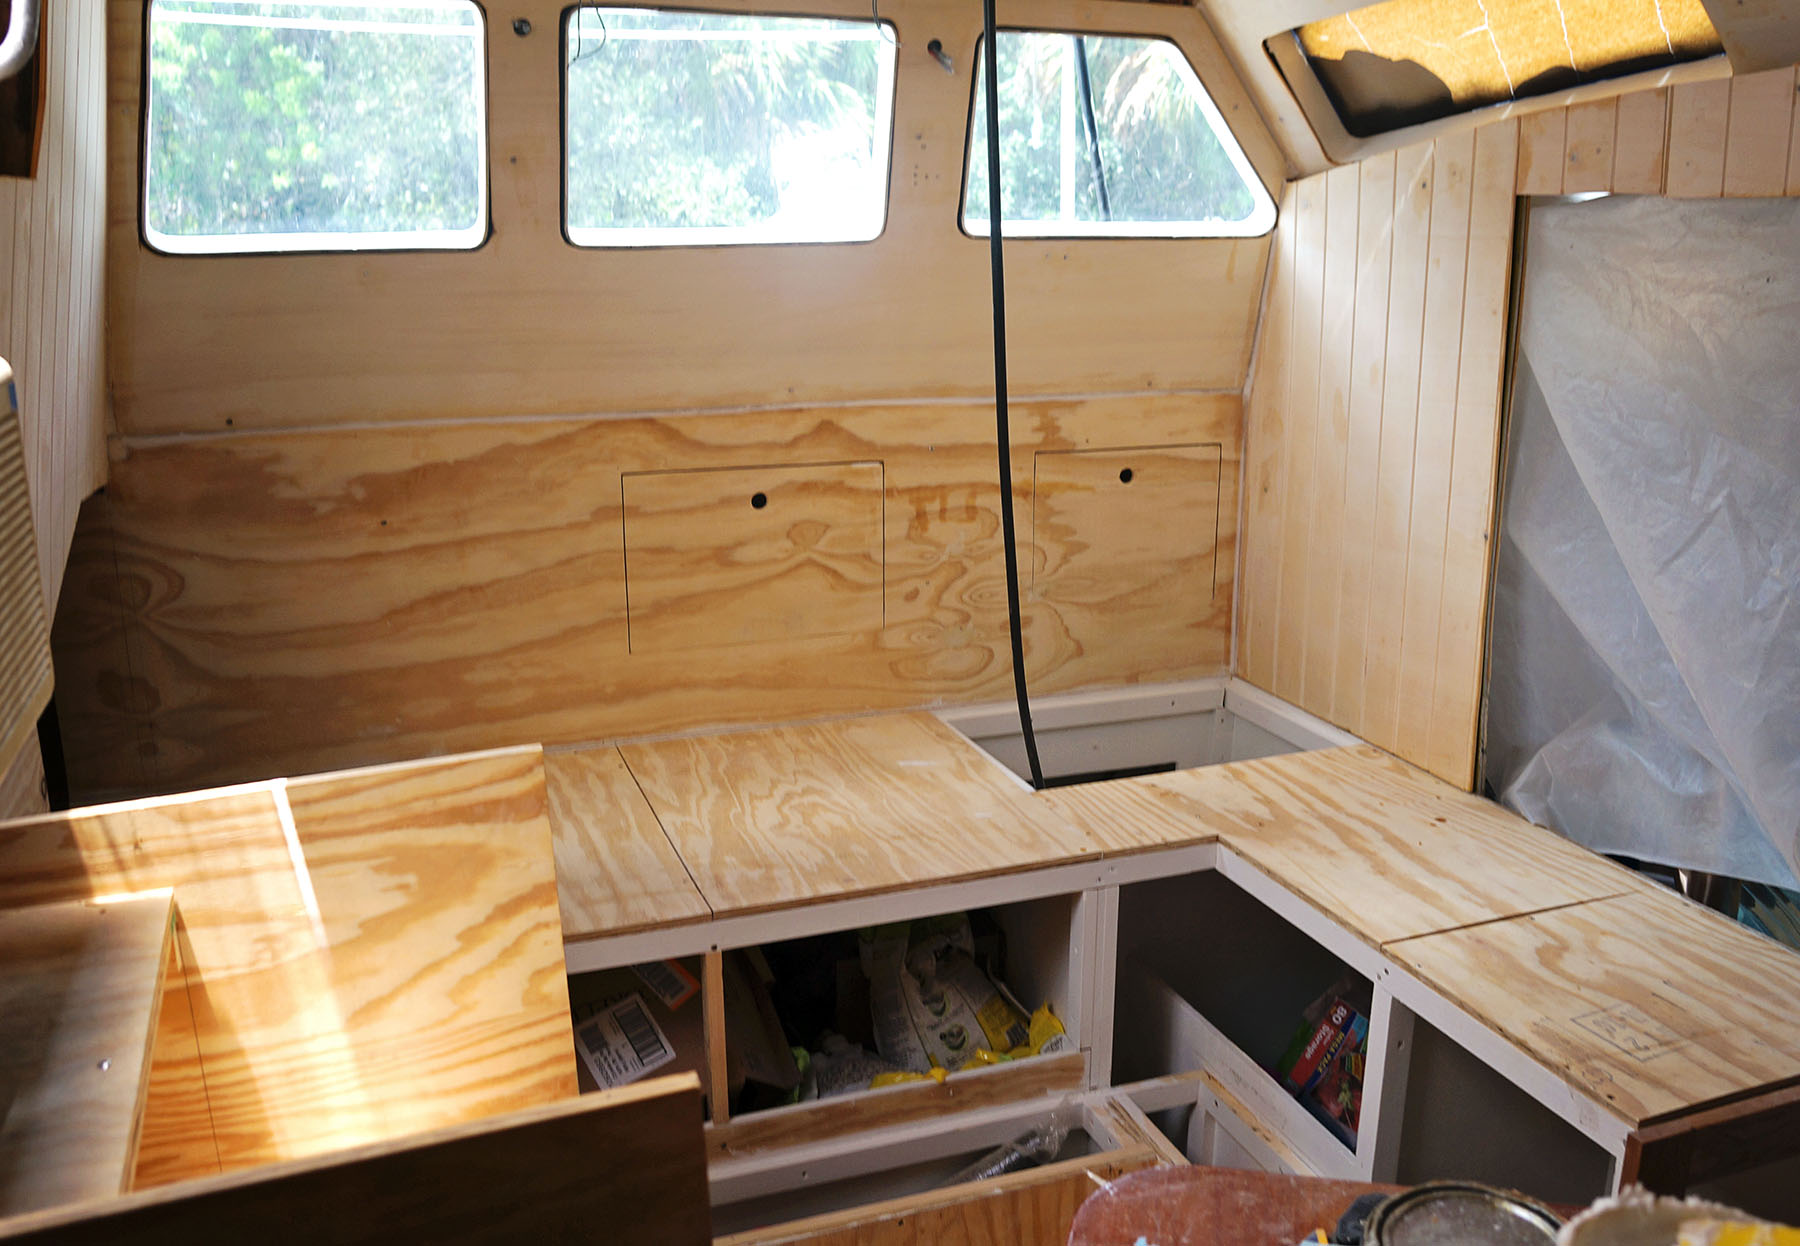
In any sense, I kept pushing past the fact that I thought my skull was going to rip out of my head, because I was determined to get an actual coat of paint on that day.  The hand sanding took me from breakfast until a late lunch, and the painting was much easier.  Our semi-gloss Valspar just glides right on, although I do have to be careful about my brush strokes.

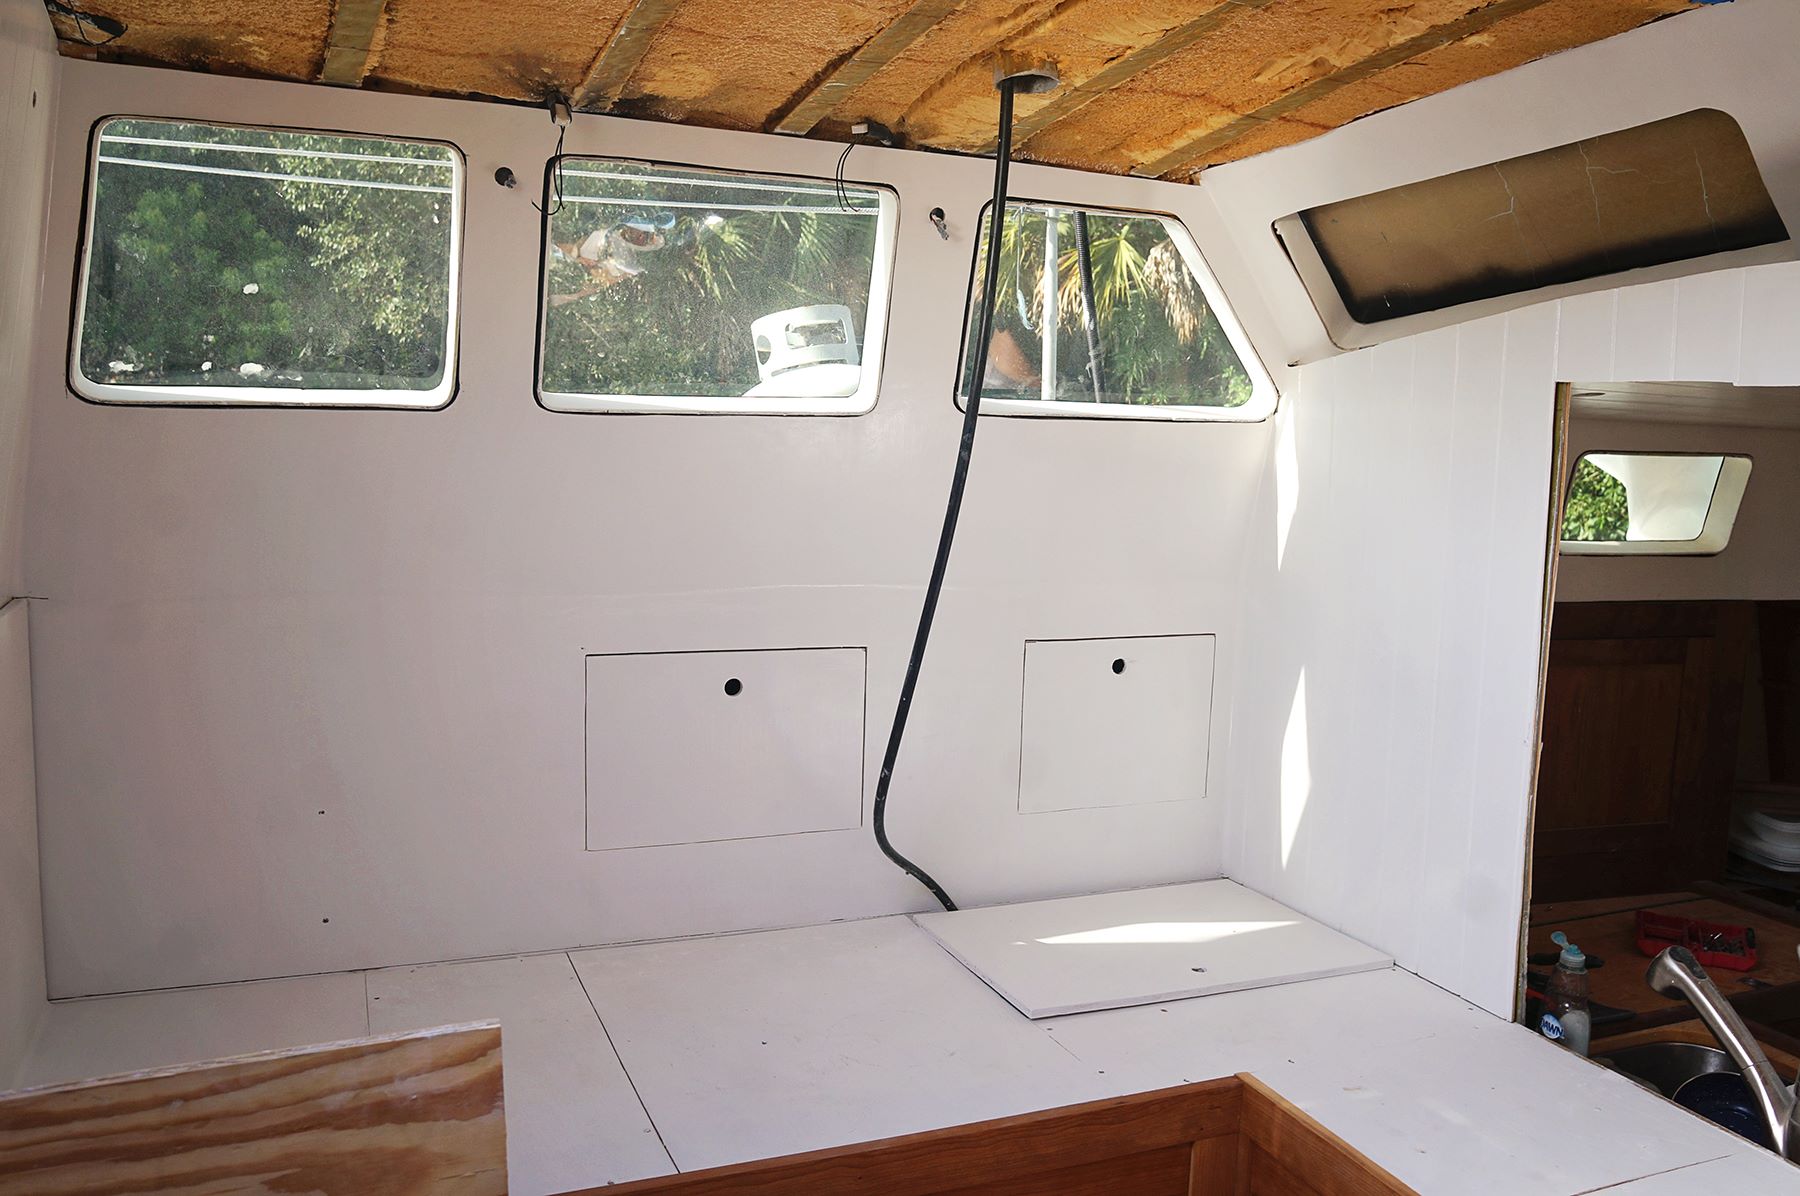
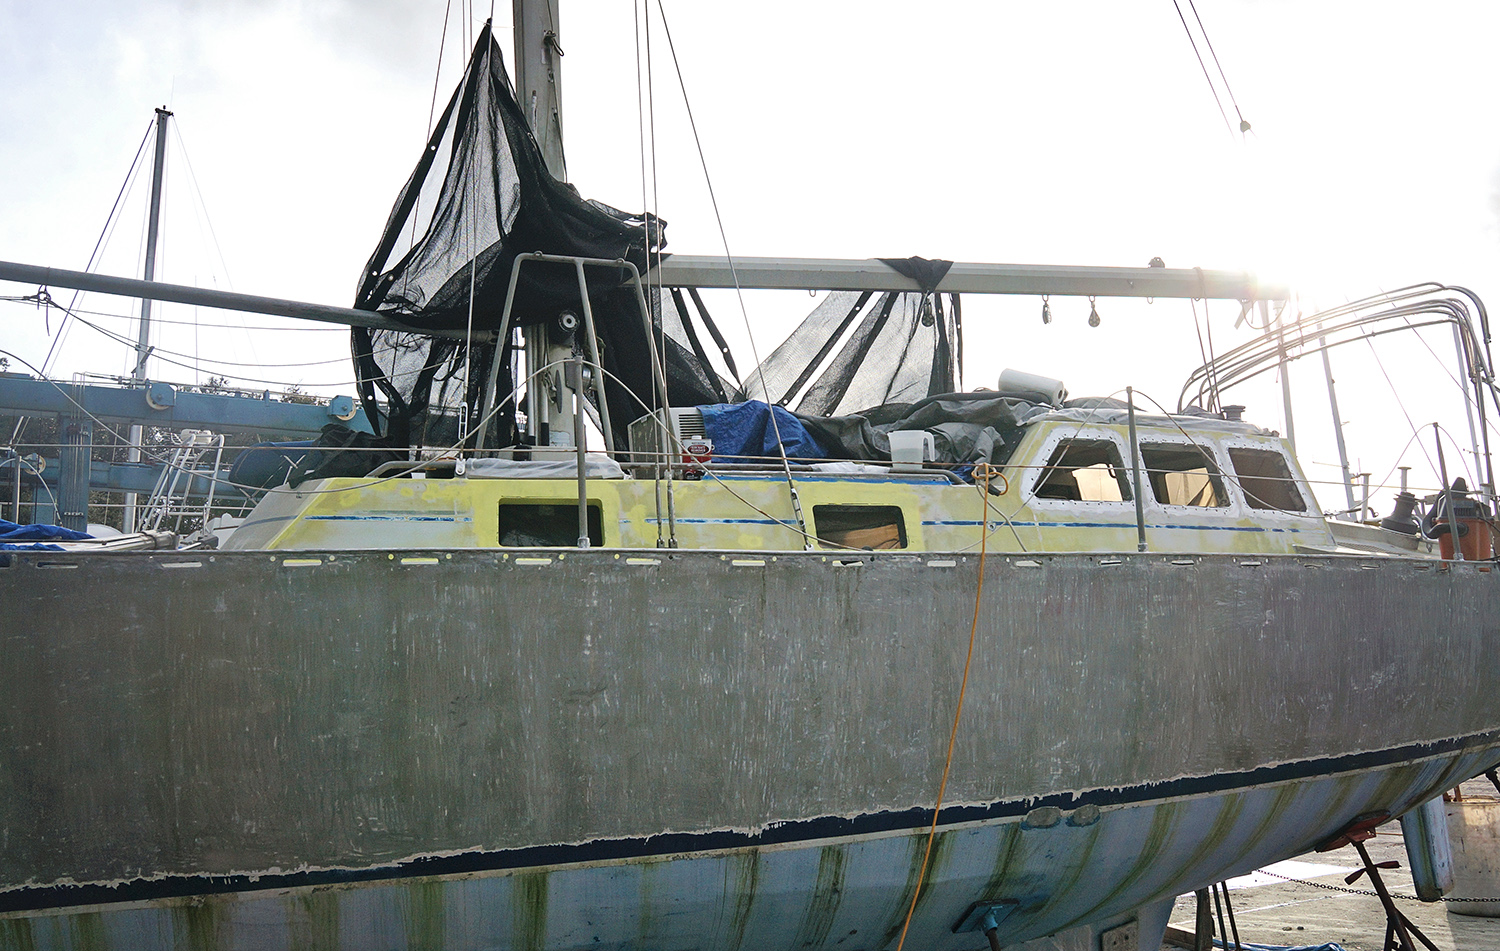
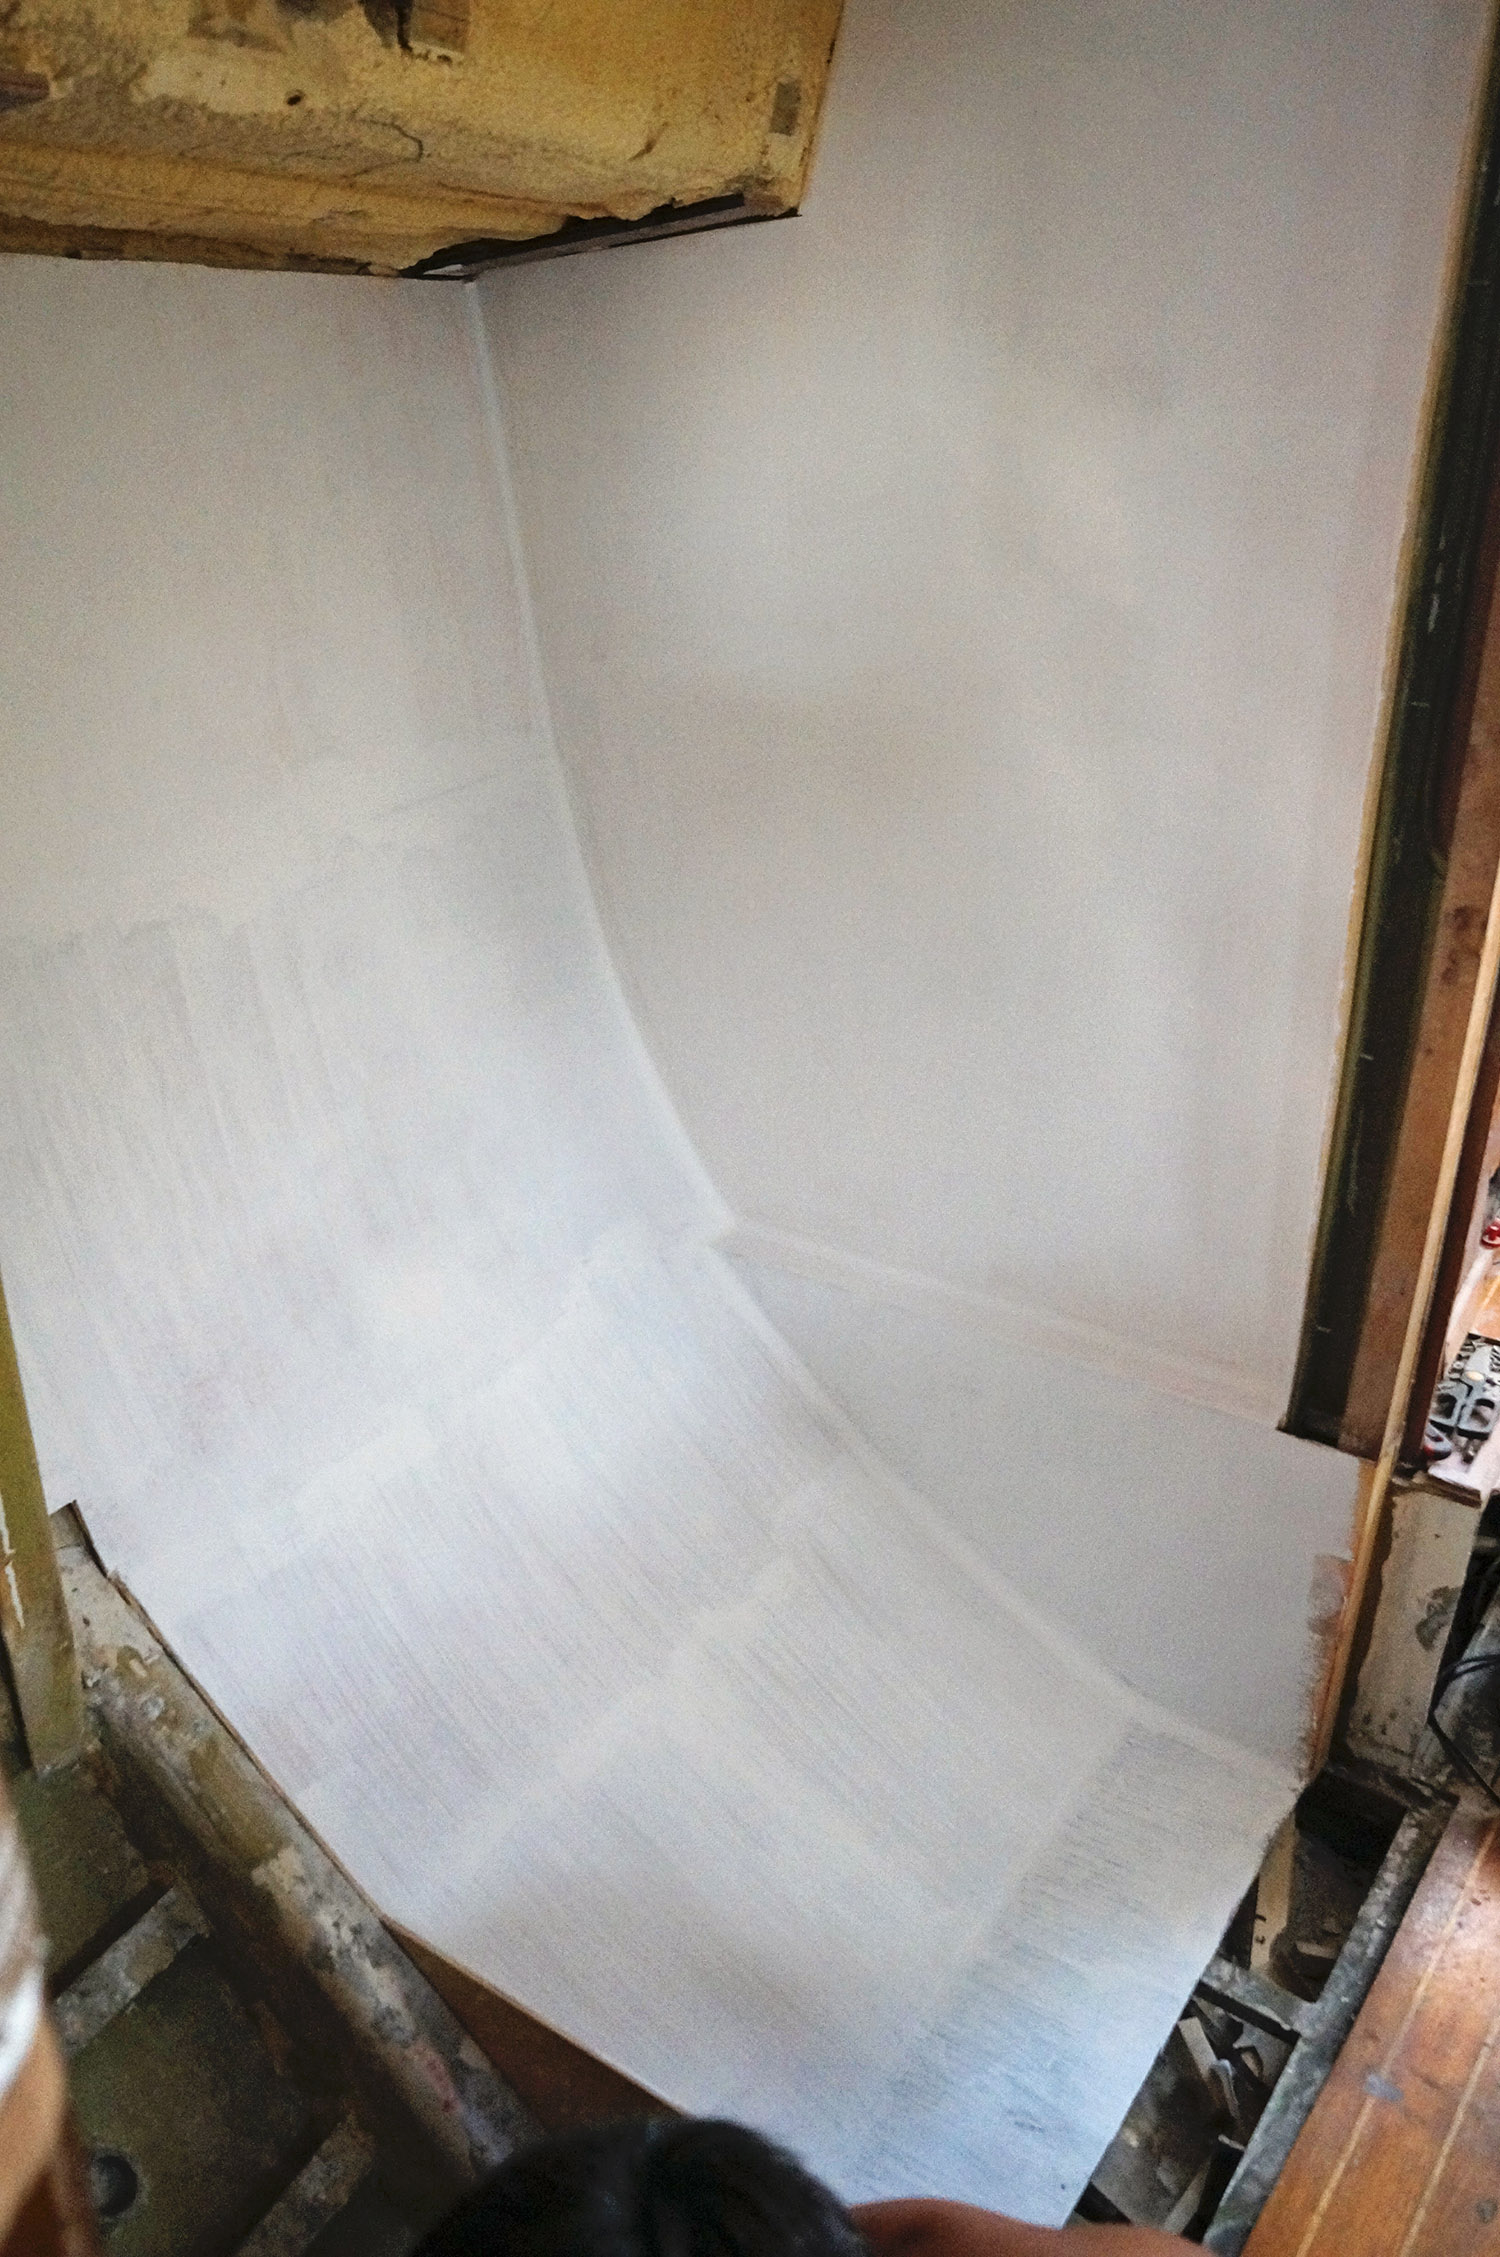
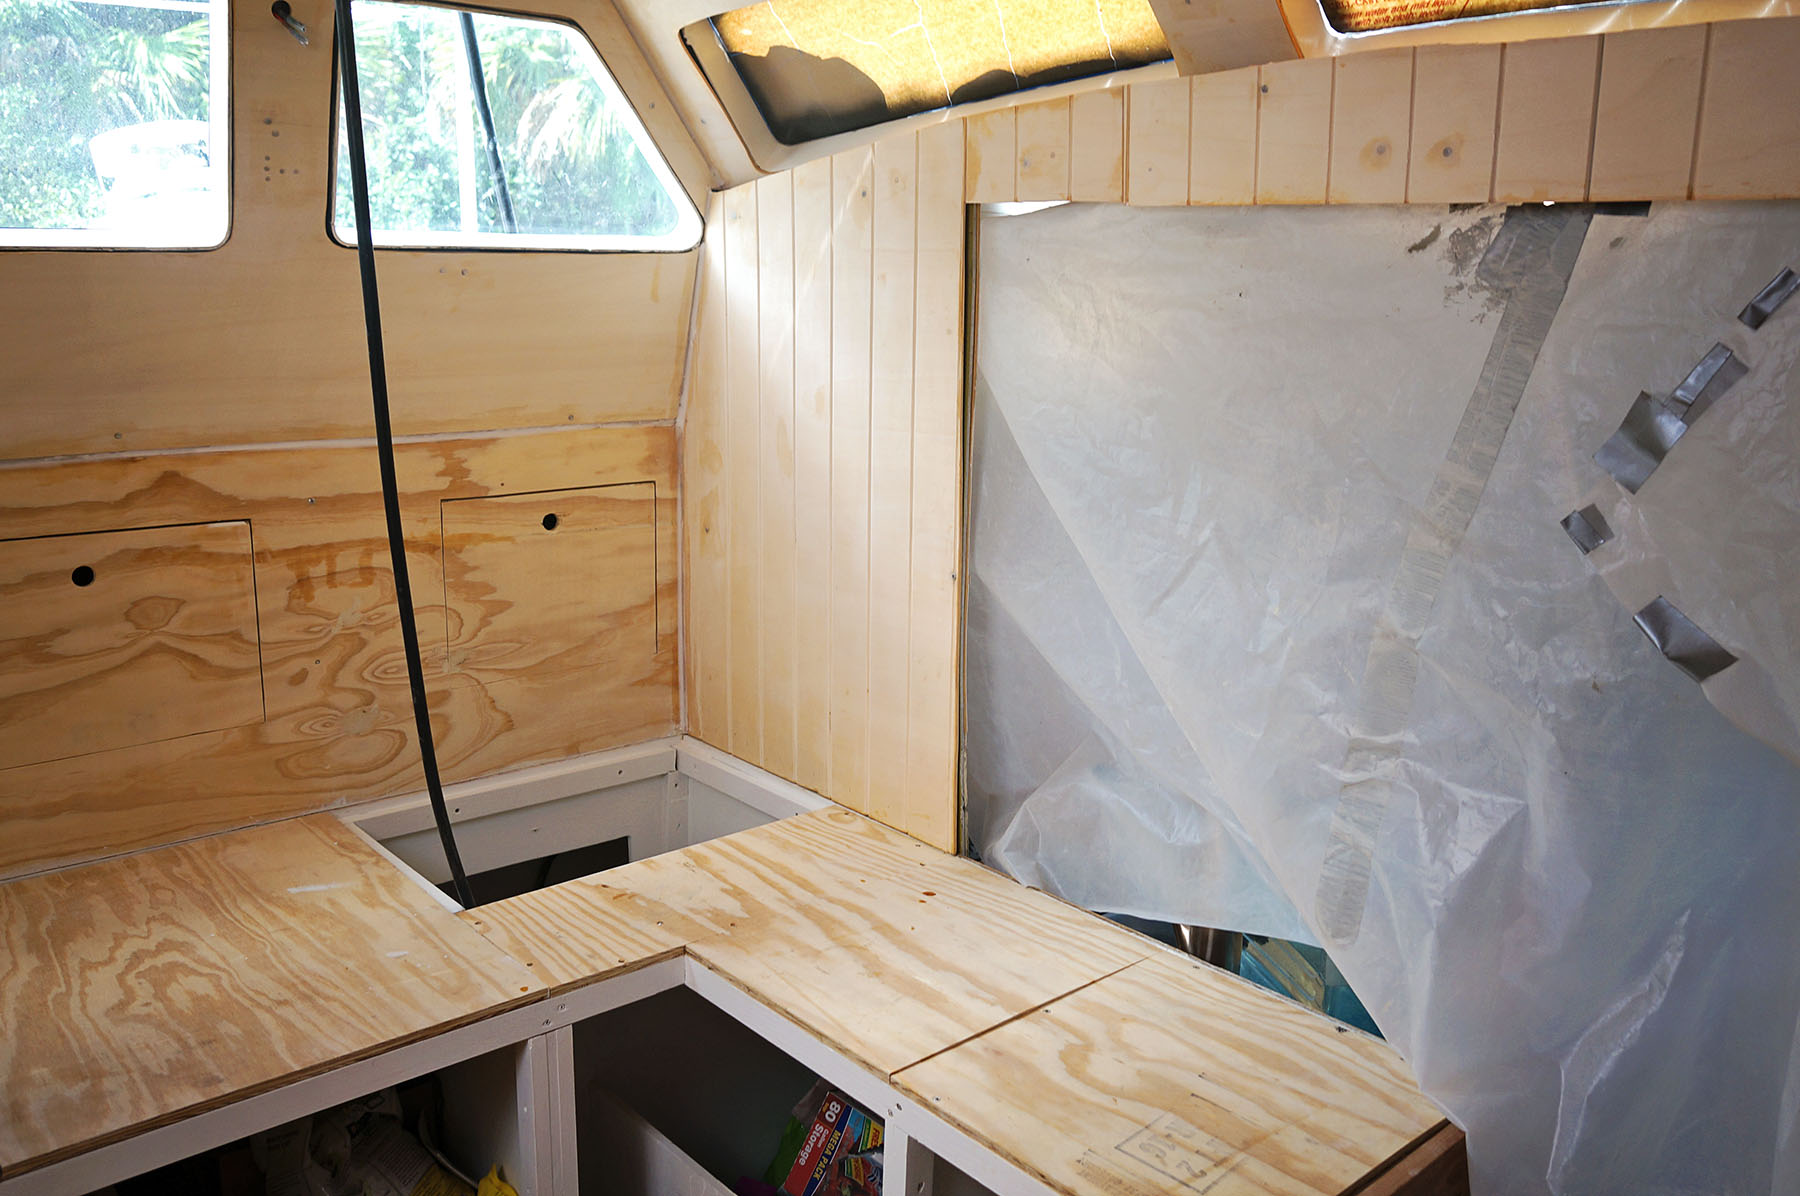
All this work did take me about an hour past my quitting time, but it was completely worth it.  Look at the difference it’s made in this space.  Pretty soon we’ll have the walls up on the port side as well, and once I’m forced to go through the hassle of filler and sanding once more, those too will be painted.

Gahhhh, I’m so excited to see how all this is coming together!

7.30.16 (6)

7.30.16 (7)

Matt sanding coachroof

On to the Next Big Project

Now that we’ve finished putting 10 of the 15 new plexi windows on Daze Off, it’s time for the next big project.  Not only to we have to prep the companionway wall in the cockpit and the front of the pilothouse for the last 5 windows by going through all the steps to get the high gloss paint on them, but at the same time we’re also going to tackle grinding and priming the top of the cabin top and pilot house.

Matt had, as always, the very non fun job of grinding all the existing paint off until we got down to bare aluminum, which ate up a few days where I spent my time below working on a sewing project (to come in a future post). I was hoping there would be very little hand sanding and we’d be able to get right on with the first layer of Aluma Protect, but this was so far from being the case.

Even though we had taken off all the hardware (including winches, blocks, and other items), there were still a number of nooks and crannies that our sander could not make it into. The areas that were becoming hardest to reach were the spots under the grab rail on the cabin top as it butts up with a rail at the edge.  With only being able to get to it from one side, and having about three inches of head room, it was my little hands that had to squeeze in there and work vigorously to remove the multiple layers of paint.

From there, the hard to reach areas only got harder.  Since everything is attached to our boat through welds, and let’s just say they’re not all clean lines, we were also left to manually remove paint from all the divots and holes in all the weld lines for the grab rails, granny bars, and cleats.  It was after I spent a full day agonizing over these areas with my measly sheet of sandpaper when I had the bright idea to bring in other tools.  Our 1/4″ chisel did a great job, with it’s tiny and sharp corner, of getting in those hard to reach areas.  Plus since I was able to put a decent amount of force on the handle, instead of slowly scraping I was usually able to just pop out the remaining chunks of paint.

The hardest area by far though, and the one left to me because of my tiny hands (yay me!!) was getting under the area where the winches sit on top of the pilot house. An area that is raised up about 1.5″, and fully painted on top as well as underneath.  For the longest time I had tried to get in there with just my hand and a sheet of sandpaper alone, working it from each side, and I hate to admit that it took me so long to figure out the best way to really get in there and apply the kind of pressure necessary to actually remove the paint (I kept bumping my knuckles against the top any time I’d try to add speed in as well), was to attach the sandpaper to a long thin stick, to reach the areas I couldn’t.  This in no way made the job a piece of cake, but it did make it manageable.  In 6 hours I think I actually removed all the paint from in there.

So you can see why we’ve probably been exhausted, robotic, and a little quiet lately.  I literally have to drink a coffee at the end of each work day now just to stay awake past dinner.  Yes, we are kind of killing ourselves and are in desperate need of a break.  There may not be any extended vacations coming up in our future for awhile, but the good news is that we do get two days off coming up for a trip to Miami.  A little bit of fun, a little bit of work, and the opportunity to do something we’ve never done before.  Curious?  Stay tuned for the next post where we go from our dirty and laborious days in the boat yard to getting 5 star treatment in the Magic City.

Matt sanding the coachroof sanding under winch holder Matt sanding coachroof bare aluminum on deck bare metal on pilothouseGeorgie under boat

zinc primer around ports

One Step Forward, Two Steps Back

I wish this post was coming to you with the good news that the new ports have been placed in the port side of the boat, but unfortunately we are back to square one.  Minus the silicone and gunk removal that is.  Or filling all the bolt holes.  But we are back to square one as far as priming and painting goes.

Everything had gone according to plan for the first few days. Directly around the now open ports we placed a coat of Petit Aluma Protect, a 2 part strontium chromate epoxy primer. This is to give a proper barrier coat over bare aluminum, and comes in an awesome almost neon yellow color.  Although we started by coating only the area surrounding the ports that we had ground down to expose and fill the extra bolt holes, as soon as that was on and protecting that bare aluminum, Matt moved on to grind off all the remaining paint from that side of the pilot house and coachroof before the entire side was coated in the Aluma Protect. So far, so good.

The next stage was to place a barrier coat on, and what we had chosen to use was Petit Protect Epoxy Primer.  The first thing that went wrong with this barrier coat is that we had meant to get it in white, but when it came in the mail we had found that we’d accidentally ordered gray.  Turns out when we placed the order button online we had been paying more attention to the sale price instead of the color. Even though the next primer coat and final coat would be white, we weren’t sure how well it would cover the darker color underneath.  Not one to throw away a good deal though, we thought we’d give it a shot. What we hadn’t expected, but found out once we’d applied the two necessary coats, is that this is a high build primer and did not want to sand well for us.

If it was a barrier coat to the bottom, no big deal.  We’d just be apply the top coat after and not worry about any bumps or ripples caused by the roller.  The topside though…yeah, a smooth surface is pretty important to us.  As soon as we’d take any kind of sandpaper to it, trying out both 100 and 220 grit, it would automatically clump the paper and we’d be left with either a bare spot where it all came off or a still semi rough surface. Thinking that maybe the primer would hide some of these mistakes and we could then smooth that down to a dimple free surface we added the next step of Petit one part white primer, the same as what we used in the head.

As you’ve probably guessed by the title of this post, it hasn’t worked out for us.  After a bit of discussion and deliberation, we talked about continuing with the products we had, doing multiple rounds of priming and sanding until we had the smooth surface we desired.  Or, we could start fresh with different products.  So that is what we have decided to do.  All of our hard work over the past 5 days is now getting washed down the drain as we grind the side back down to bare metal and start from scratch.

We’ll be keeping the Petit Aluma Protect as our barrier for the aluminum, although after that point we’re switching to Interlux InterProtect for the barrier and primer coats. A little more time and money out the window, but what can you do? Being such a major focus of the boat we can’t do a slapdash job on the paint and hope no one we’ll notice.  We certainly would.

We’re sad the line of Petit products didn’t work out for us although we’re still using them for the top coat), and it’s possible the fault could have been all our own. Maybe I just have terrible ratio and mixing skills.  We’ll never know. The new products should be arriving any day though,  and we hope this time around everything goes much smoother.  Both literally and figuratively.

removing paint around ports

zinc chromate primer

Jessica mixing primer

ghost ship Daze Off

zinc primer around ports

barrier coat around ports


taking paint off aluminum hull

Going Bare: Stripping the Paint Off our Aluminum Hull

scraping paint from aluminum

Awhile back when we were de-naming our boat by trying different methods to remove paint and see if it was what we wanted for the final product, there was a debate on if we did in fact want to go down to bare metal or just remove the top layer and repaint with a fresh white coat.  And if we did decide to remove all the way down, what would be the best way to do it?

One of the first things we tried was to try an 80 grit flap disc to see how much of the paint it would remove, and how quickly.  We already had all the tools necessary for this, so we didn’t lose much by spending one hour one afternoon to see what it could do.  The second option of removing the paint would be with a strong chemical stripper, and that we would have to go out and purchase.  If you haven’t met us, we don’t like to spend money on things that aren’t necessary.  But since we were 90% sure that a bare hull was the route we wanted to go, it was worth it to buy a quart of the stuff just to test it out.

Working a small patch by the bow on the port side, we found out the instructions were completely inaccurate when it said that paint would be ready to come off in 5-10 minutes.  After believing this is how it was supposed to work and ready to give up on that as an option after 3 tries, we waited a few months until temperatures had cooled down just a little and left it on for 20 minutes to see what it would do.  Turns out that was the trick and using the chemical stripper became a very viable option.

Having done only one small strip though, we still didn’t know if we would like the entire boat bare.  I think I was initially more for it than Matt, although his big worry was that we would take all the paint off only to find out that a previous owner had put it there for a reason.  As in, there were many uneven spots that had to be fared and covered so they wouldn’t be noticeable.  Stripping off just a little more, and just a little more, we eventually got to a point where it would be too much work to replace it with a chrome primer, barrier coat, and paint would have been too much work.  A decision had to be made.  In the end we decided to take our chances with the bare metal as we kind of liked how it was looking, plus once it’s finished we’ll have the added bonus of forgetting all about it.  No worries about scratching the paint in our future.

Our test coats of paint removal were done with Klean-Strip Aircraft Paint Remover, but once we knew this was the route we wanted to take, Matt did a little searching online and found a good deal on gallons of Rust-oleum Aircraft Remover and we switched over to that. From that point on it became a goal to get as much of the paint off as soon as possible.  We had originally discussed it as a task to be done when we were stuck between other projects, or only an hour or two a day so we didn’t wear ourselves out.  Turns out though, our drive to complete just one project was far greater than the need to spread it out, and we were able to do the whole boat in under two weeks. (The two sides split up with the visit from my parents.)

paint on aluminum boat

chemical stripper to remove paint

paint coming off hull

Through a little bit of practice, we found a method that worked very well for us.  Overall it took 2-3 rounds of applying the remover before we were down to bare metal.  First I would go through with a chip brush and a metal pan filled with the remover, since it was one of the few items the chemicals wouldn’t eat through.  Wearing a full face mask, gloves and long sleeves, I’d go through and paint on a very thick coat to a section about five feet long, and all the way top to bottom.  Sometimes an unfortunate drop would come in contact with an exposed area of my skin that happened to sneak out of it’s clothing, but the good thing with this is that water neutralizes the chemical, and with a few seconds under the hose I’d be good as new again.

Waiting for 20 minutes to let the stripper set in, you could actually begin to see the paint bubble and flake in some areas as the chemicals did their job.  With a 2″ paint scraper, Matt would then go through to take off the first round of paint.  I can’t remember what the names of the existing coats were, but there was a white top coat, a yellow barrier coat I’m guessing, and a peach primer.  In some areas he would get all the way down to bare metal, and sometimes he’d only get down to the barrier coat.  I really liked the times he was able to get down to the primer.  That is because as soon as he finished his first round of scraping, I’d be right behind him applying another coat.

The second coat didn’t need as much time to set in, sometimes only 5 minutes we we had removed almost everything already, or maybe 10 minutes where he’d just been able to get the surface coat off. Â I really liked it when we were down to just yellow, because it was my muscle that went through and did the second round of scraping. Luckily I have a husband with some pretty good pipes and a lot of determination, so by the time it got to me there wasn’t a lot of work left. Â At least, nothing that my arms couldn’t handle. I easily scrapped off the yellow coat, and usually the peach coat as well. If things were extremely stuck on there though, we’d just brush on a third coat of paint remover. If you’re planning on painting your boat and need a thickening agent, I would recommend you learn more about cabosil.

taking paint off aluminum hull

taking paint off aluminum hull

chemical paint stripper

It was quite an accomplishment when all the paint was off, but as you can see from the photos, the scrape marks from the paint were still very visible as there were just the smallest amounts left. Before we’re completely finished with the hull there will still be a few steps left, but right away we wanted to get an initial sanding done.  Just like we’d tried before on the stern, Matt went though the hull with 100 grit flip discs this time to take off any remaining paint and give the slightest shine to it at the moment.  Before we can call ourselves good on this project though, he’ll have to go through again with a 150 and then 220 grit, and finally an acid wash to brighten the hull and overall even the tone.

While he was getting quite the workout on this project, I had the not so muscle straining, although very much detailed project of removing paint from the toe rails.  All the little areas where I have to get in there with chisels and small scrappers. It hasn’t been as much of a pain in the butt project as I thought it would be though.  4 partial days of work on it and I was able to get enough paint off for Matt to come in with a grinder and give them a good shine.

With the headache we thought the task of removing the paint would be, the whole process turned out to be much easier, cheaper, and even quicker than we thought.  2 gallons and 2 quarts later and we have a bare metal boat.  Now we’re very happy the marina doesn’t allow soda blasting and we didn’t put a lot of money toward that when it turns out it wasn’t necessary.  An actual win for us on a project!

taking paint off toe rail

removing paint from toe rail

Jessica sanding

The Beginnings of Our Shower

Friday November 13, 2015

Jessica sanding

I remember when I thought the head would be a breeze to get through.  Throw up a few walls, add some cabinets, slap on a little paint and we’d be finished.  The hardest part would be the plumbing, and since that falls to Matt, all I would have to do for that project was be his gopher and that was fine by me.  I think he knows that day is coming though and has decided to punish me in advance.

True to form, this project did start with all Matt.  He looked at the space, figured out the best way to utilize it, and began taking the measurements to fit in the necessary pieces.  The head and cabinet would be in the forward part of the head and the sink and shower would be in it’s aft area.  That is the area we are throwing all of our focus right now.  It began the usual way of taking epoxied furring strips and mounting them to the aluminum frame attached to the hull, and making templates which were traced on to Eurolite boards and cut out.  These never fit exactly right the first time, so after 3 or 4 more trips out to the jigsaw for me, they were ready to mount.  Then it was supposed to be Matt’s turn.

And it was, for awhile.  He had the dull and tedious job of cutting out 6oz woven fiberglass cloth and then using epoxy to adhere it to the boards, making sure to feather out all air bubbles for a smooth finish.  I did my job of mixing the epoxy for him and then stood back while he did the work.  The next step after it had a few coats and ample time to dry was to fill in all the gaps between the boards.  Not only to keep water leaking in anywhere, since it is our shower, but also to give the boards added strength so they don’t flex and break.  My job was more or less the same, only this time I added filler to the epoxy. Day one of filler was colloidal silica.  And this is where the story gets ugly.  This is about the time I began to lose my sanity.

Not just for having to add it to the epoxy, no, that part is fine.  Aside from the fact of needing to wear a face mask because fine powders waft up in the air and into your nose and mouth if given the chance, it’s actually an easy and sometimes fun project.  We use food groups to base the consistency, usually aiming for either mayonnaise or peanut butter. The mental breakdowns began when it was time to start sanding off the excess.  And that is where I come in to the picture.  Not the brains of any of these projects, but just the brawn. The mindless, endless work that Matt can’t stand yet I am oh so good at.  Sometimes, you should just hide your talents.

So it fell on me that every time a filler would be added to any of these spaces, I would be sent in to smooth things out.  I spent 6 hours doing it the first day.  Sometimes standing, sometimes, squatting, but usually trying to keep my balance against the sloped wall behind me and not always succeeding. There were a few times I rode that thing like a slide, right into the casing for the centerboard three feet in front of me. Also, Florida decided never to let fall come in for it’s yearly visit, so temperatures inside the boat have been hovering around 90 degrees everyday.  That’s with the air conditioner on high.  I had to take to wearing sports bras and shorts just to survive the heat, and then suffer through the itch of having wedged myself against fiberglass all day.

The second day was slightly better as we moved from using colloidal silica as our filler, which makes surfaces rock hard and almost impossible to put a dent in while hand sanding, to using Q cells which are smaller glass bubbles and are much easier to work with.  Usually as a finishing faring compound where you don’t need the same strength you receive with colloidal silica, but mostly need to fill gaps.  It only took me 4 hours of work on this second day, and I thought I was out of the dog house.  That my punishment had been finished and we could now begin painting and maybe even throw up a pretty little vase.

No. We had two more rounds of filler with the Q cells.  Half way through the third day I questioned why I ever agreed to rebuild this boat.  By the fourth day I was ready to burn it down.  My only saving grace was a well deserved ice cold beer at the end of the day.  Which, coupled with all my labor through the day, had me ready to crawl in to bed each night by 8 pm.  I thought I could put this ugly business behind me when the filler was done after 4 days and we were ready to paint.  Usually a task that I handle, but as Matt began prepping all the brushes and rollers, he forgot that he was supposed to hand this project over to me and instead began right on it himself.  I did not feel a need to remind him.

Unbeknownst to me, this was another project that required sanding.  For every coat of primer and paint that went on (except the last one), the previous coat needed to be sanded down to a smooth finish so that we would not have the ripple effect leftover from the roller. And guess who got to do it every day?  This girl!!  But we have just put the last coat of paint on today and now I can happily go back to being Matt’s gopher.  I won’t even complain when he sends me up and down the steps 4 times in 10 minutes because he forgot something either inside the boat or out of it.  I swear!  I’ve seen the worst there is!

Did I have it coming?  Of course I did.  I’ve been working the cushy jobs for way too long while Matt labors away, both mentally and physically, while I just carry this or that around during the day, and occasionally pop my head up from the blog or Instagram to say “What?” while he’s doing all of the planning and research in our evening hours.  I hear this type of thing will happen again.  I hear this will not be the last time. And I know this project will once again fall to me. But I have survived it once, and I know I can do it again.  Probably once. Any more than that though, and this effing boat is getting burned down.

building boat shower

adding filler to cracks

sanding colloidal silica

Jessica sanding colloidal silica

painted shower

*That is only our first coat of primer…trust me, that’s not near finished!

** I love the fact that I posted a photo of me doing this terrible job of sanding on Facebook, and one of you awesome readers turned it into a black and white photo and said that it looks like a sad National Geographic photo!

sanding bw

Finally Making Progress

Sunday April 1, 2012

Only two weeks into sanding and I was already starting to dread Sundays.  The hassle and 60 minutes spent to get the tarps up while the wind fought me every step of the way, working with a sander that did not get me anywhere, and having my whole body aching by the end of the day.  It may not have been so bad if I could tell that I was making progress or the end was in sight, but when we got to the marina and I took a look at the boat there was still sooooo much more to be done.  In my head I kept thinking that if I were to keep working at this pace every week we really would not finish this project until some time in the fall.

After getting everything set up for hte day I was ready to pull out the Makita when Matt said I should switch to the the Porter Cable he had been using in the fall.  He thought I’d get much further with it than what I had been using and it would make work a lot easier on me.  At first I was thinking this plan would not work at all because the thing was huge and I was pretty sure there was no way I’d be able to hold it up for more than 30 seconds at a time but I figured I’d work with it for thirty minutes just to tell him I tried and then go back to the Makita.

Lifting the heavy sander I turned it sideways so I could get a better grip, turned it on and held it up to the hull.  The moment the rough paper touched the paint it began to take it off immediately.  This wasn’t like the Makita where the paint would turn 3 different colors before I could see the white/gray hull.   Removing the paint wasn’t the full 6″ diameter of the sander but it was a few inches high by a few inches wide which was good enough for me.  Working the sander from left to right the paint would just fall off although huge clouds of dust always followed it.  When I’d start to get to an area where I was raising the sander enough so it was level with my face I’d pull out a little step ladder and keeping working my way up.  The progress I was now making with the larger sander was amazing.  In one hour with the Porter Cable I did more than one whole day with the Makita.  By the time I was nearing the end of my work day I had probably gotten 1/3 of the Port side of the hull done.  I hadn’t gone underneath the hull though because that would have actually required me to hold the sander above my head and I didn’t think I was ready for that yet.  My arms were still adjusting to the extra weight of the heavier sander and quitting time did end up coming 45 minutes earlier than normal.  I was still proud of my work though and in a tired but estatic  way I was thinking this project may actually get finished in the next few weeks.

Getting ready to start


Pinned Down

Sunday March 25, 2012

I was not looking forward to going to the boat today since I was already slightly defeated from the small amount of work I had completed last week.  At least I knew I’d be able to angle the sander all day today which meant I should get more accomplished and that made me feel a little better.  Winds were whipping around in the 10-15 mph range and even after having Matt help me with the tarps I was still having issues.  It would blow into the areas where the tarp was overlapping,  catch it like a sail filling with wind and eventually start to pull the tape from the hull.  Not wanting to give up a full day of work I needed to find a way to get the tarp completely closed.  I had tried taping small sections together but it wasn’t doing much good and would just make it harder to take apart and put back together.  Knowing there wouldn’t be anything laying around the boat to do the job and not even wanting to make an attempt at a search to see if there was I stole the car keys from Matt to drive to the local dollar store.  Passing through the aisles of random things looking for laundry supplies (hardcover books for $1, what?!) I finally found the clothespins which I assumed would do the job and picked up a few boxes of 50 knowing they probably wouldn’t be the best of quality and I’d need to stock up.  Getting back to the boat I ripped opened a packed and started pinning all the openings shut.

When I was able to get inside and start on the actual work the area I had been sanding last week was now blocked by the wind and I’d be eating tarp if I wanted to work there.  Moving on to the Port side, since I had the whole thing to do anyway, I started in the same stern area.  The little bit of exercise my muscles and steroids last week must have been enough to strengthen a little bit because my arms were not as sore as the first time around.  I could usually go three minutes before breaking and even then it would only be about thirty seconds before I got back to work.  I worked hard and I worked all day.  In the end it still feels like I didn’t get anything done.  I’m going to have to bring out some big guns next time.

La Femme Makita

Sunday March 18, 2012

St. Patrick’s Day happened to fall on a Saturday this year.  If you coupled that with what we were expecting our night to be after last year (first time hanging out with Jeff and Jared at the bars for an awesome time!) and the fact that we should have been going balls out since this was our last St. Paddy’s Day with friends, you would expect that we wouldn’t be able to drag ourselves out of bed at all, let alone work on the boat.  But after being mobbed in our car on the way downtown from thousands of drunks taking advantage of the 80 degree weather, we ended up at TGI Fridays where I had one green beer and what I expect were watered down margaritas.  When we woke up the next morning it was as if we had stayed home all night.  Not to mention the sun was shining and it was 25 degrees warmer  outside than it should be right now, the kind of day that makes you want to rush outside, even if it is to do manual labor.

Wanting to wear shorts and a t-shirt in the heat I was still banished to wearing jeans and a long sleeve shirt because of all the dust particles I was about to encounter.  Winds were predicted to be under 10 knots all day which meant I should not have any issues getting the tarps to stay up.  When we got out of the car there was just a slight breeze on my face, but there must be something about where our boat sits because as soon as we started walking down the row where Serendip stood there was a strong wind whipping right through.  Again, starting to tape on the side the wind was blowing I didn’t have much difficulty getting it to stay.  Once I got to the other side however, the wind kept trying to rip the tarp  out of my hands and rip the tape off the boat.  I knew I could get the tarp to stay in place if it were weighted at the bottom but there was nothing around me.  Abandoning the remaining tarp that was flapping in the wind I climbed into the boat to try and find any heavy objects I’d be able to anchor down the bottom of the tarp with and hopefully keep the top part from detaching from the boat.  In the mess of everything in the cockpit and cabin I thought I’d be able to find some kind of cart or container to do the job, but anything we had would have been much to big of a hassle to even try and get down the ladder.  Matt being ever so clever went up on deck to release the anchor chain and we could use the length and weight to hold down the bottom of the tarp and keep it in place.  He wound it around the boat while I was able to finally successfully keep it taped to the boat up top.

With Matt’s help I was able to get everything set up within a matter of minutes at this point.  I pulled the  little Makita palm sander we borrowed from Jack out of it’s box and went to work where Matt had left off last fall.  It was the aft area of the boat and I was hoping to be able to finish u the rest of that side that afternoon.  I had very specific instructions that the sander had to be held flat against the hull of the boat and couldn’t use it at any angles for fear of digging in.  I switched the on button and held the sander on a spot in front of my face.  It spun to life and as I held it in a spot the now gray color of the hull would give way to the burnt orange underneath and finally the white/gray of the hull.  I was able to work for about 90 seconds and then my arms would become sore and I’d have to break for 60 seconds and then go back to work.  Every 3-4 rounds of this I’d have to take a longer 2-3 minute break.  I knew I wouldn’t be great at this project but was pleased with myself for making any kind of advancement.  It was obvious right away though that my progress was not as quick as I’d originally hoped it would be with the sander and it would be very unlikely to finish that side that day.  I was hoping it would not be my job to sand the entire hull (the port side had not even been touched yet) because working once a week at the pace I was would have me finishing sometime in September.  At this point I assumed I was probably just ‘extra help’ to take a few hours of work away from Matt when he went back to finish the project himself.  I kept dutifully working for 90 seconds at a time making sure I could help out as much as possible and leave him with only one full day of sanding.

You can see the line to the right where I started

As the day dragged on my arms were feeling weaker and weaker and the work time would change t0 60 seconds with 90 second breaks.  The ‘long’ breaks also became longer lasting for about five minutes where I’d lay on the ground and try to get rid of the awful pain in my back.  When Matt came down to check on me one hour before quitting time he took at my work and turned to me and said, ‘So think you’ll be able to finish this side before we go home tonight?’.  I laughed as I knew by now there was no way it could be done.  When he realized I was serious he went into time-panick mode.  ‘I thought you’d be able to do this today.  We don’t have a lot of time, you still have to do the whole other side.’  (Me) ‘You know I don’t have the strength to work as quickly as you, I thought I was just helping out so that when you went back to do it there wouldn’t be as much work.’  Neither of us were mad or yelling at each other, but there was a conversation going back and forth of how I didn’t have the strength for a project like this and he didn’t have time with all the other million things that have to be done to take time out and work on this too.

He took the sander from my hands and try it himself to make sure it was not an issue with the sander itself that was slowing down my work compared to when he was doing it.  As I watched him work the sander (which was perfectly fine) I was that he’d angle it in certain spots to get down to bare hull.  I ask why he was allowed to angle it but I had to keep it completely flat.  He replied again it was so I didn’t accidentally dig into the hull.  Exasperated I came back that if he could do it without digging into the hull that I’m sure my light touch could do it too.  I also replied that part of the reason my arms were so tired was using all of my energy to keep the sander flat while still giving it enough force to do anything.  I told him that if I were allowed to angle it I’d be able to get much more work done.  He handed the sander back to me and told me to be careful not to do any damage.  As he went back up the ladder to work in the cabin I went back to work sanding with much more ease.  I was able to get twice as much area sanded in almost half the time.  In the next 45 minutes I worked there was dust flying everywhere as bottom became more and more bare.  I still wasn’t able to finish that side but by the time I started clean up I was much further along than I would have been flat sanding.

I was still ready to pack up and go home around 6:30, vacuuming the dust particles that had fallen on the tarp below me and the cradle of the boat.  I un-taped the tarp and Matt brought the anchor chain back up in the locker.  We had everything cleaned up and I was happy not to have to raise my arms again.  I did however snatch my camera out of my purse and snap a few photos of the docks near us and the first boat of the year to make it in the water.

Nemesis

Sunday October 23, 2011

I was quite surprised this morning when we left home and I still had full use of my arms.  I was originally thinking that I’d be so sore from Friday that I wouldn’t even be able to brush my hair.  I knew I wouldn’t have Superman strength that day (not that I ever do), but was confident I would get a decent amount of work done.  To help us even more we made a quick stop at Home Depot and picked up some 60 grit sandpaper for our sanders to help push through the layers of paint quicker.  Throwing up the ladder and climing into the cockpit when we got there it looked like a layer of dirt or dust was covering our boat and the boat next to ours.  There was still a little morning dew on the deck as well, so Matt rubbed the surface with his finger and it came right off.  We knew it would need rinsing off (as well as the boat next to ours) but we figured we might as well wait until the end of the day since we were just going to make a mess again.

Ther original plan of the morning ws for Matt to work on the hull of the boat with his larger sander while I was going to try again with the Makita sander lent to us by Jack.  This plan lasted all of five minutes where we still weren’t able to supply both of us with enough power and I was forced to go back to the chisel.  The good thing about working on the keel for me is that there was actually a good spot for me to sit on the cradle while working and I rarely had to lift my arms above my head.  Matt was zooming along with the coarser sandpaper ans were were on the road to having a ton done that day.  And that’s when he pulled up…..Nemisis.

Just as Matt was going to have me walk around the boat while he was sanding to see if the dust was floating anywhere, a black pick-up truck pulled into a spot by our stern and a man got out and walked over to the boat next to ours.  We immediately walked over and Matt apologized for us running our electrical cord through their boat cradle to get to shore power and offered to move it.  We also mentioned that we think some of the dust from our sanding had landed on their boat and we’d be happy to wash it off for him.  Instead of being greeted in return with the friendly boater reply of ‘Wow, thank you so much, that would be really nice’ that we were expecting, we got this instead.  ‘We had this same problem last year when someone next to us with a blue bottom sanded and got dust all over our boat.  It’s not going to come off with soap and water.’  Turns, and walks away.

We looked at eachother in shock with a kind of ‘what do we do now?’ expression while we walked back to our boat.  That day we had been working on the Starboard side of the boat while their’s is to our Port side so luckily we didn’t have to look at Nemisis and his wife while they worked on their boat.  Sanding again was obviously not an option while they were there, at least not with the power sander Matt was using.  Both of us took shelter behind the keel, completely hidden from view of Nemisis and his wife.  We started hand scraping just to be doing something and wondered how long this other couple would be here.  We were desperate to run up the ladder of their boat and show them how easily the dust does actually wipe off but we figured the best course of action was would be to stay where we were and attempt cleaning it after they had left.  It felt agonizingly long but an hour to an hour and a half later we could tell they were packing it up for the day.  By this time Matt had pulled out the palm sander to do work on some of the hard to reach areas on the bottom of the hull.  I saw Nemisis walk up first and tapped Matt on the shoulder.  We both turned around as Nemisis explained that the dust was in fact very bad and he would be contacting the service department at Torrsen’s the next morning to see what chemicals could be used to clean his boat without damaging it.  He said we should expect to be hearing from them (Torrsen’s) soon and again walked away to his truck to leave.

This is where Matt and I differ on our feelings of the situation.  He feels our neighbor has every right to be mad since it was our fault his boat is ‘damaged’.  He also feels that this guy has every right to treat us as inconsiderately as he did because it’s understandable that he’d be upset especially if this was the second year in a row this has happened to him.  Then there’s me.  Although I agree this was our fault and we should be the ones to take care of it, I feel we should be treated better than we were.  We told this guy immediately about his boat as soon as he pulled up that day.  We admitted it was our fault and the next words our of our mouth were ‘We’ll do whatever it takes to fix it’.  Yet still we could not get one Thank you or I appreciate that out of him.

So when they pulled out we raced up our boat to get a closer look at his.  The morning dew was long gone and our finger rubbing did nothing this time around.  Matt started pulling out cleaners and we mixed them in a bowl with water and applied it to his fiberglass with a wet rag.  Nothin’.  We pulled out every cleaning supply on board and it was not getting any closer to coming off.  This sent Matt into a panic.  He imagined that Nemesis’ boat would have to be pulled into the service area to be cleaned and polished professionally.  He started calculating the cost in his head, what our deductible was and what we would have to pay out of our pockets.  He was obviously too scared to keep sanding any further that day so we moved to the next project on the list, putting anti-freeze in the lines.  It took us less than a half hour and we were still left with a little over two hours of daylight.    Since the only project available for us to do that day was sanding and Matt was still in such a panic we decided to go home so he could begin his hours of research on the internet of what takes paint from fiberglass and what the cost of a professional cleaning would be (expensive).  In the end the plan was for me to drive out as soon as the sun was up the next morning and give another attempt to clean it since I couldn’t get away from the explanation that the morning dew wiped it right off as soon as we had gotten there.

Rolling out of bed the next day in the dark I put on grungy clothes and packed nice ones in my car for work.  I made the drive out to Muskegon with a stop at Meijer on the way for some rags and cleaning products.  The first thing I did when I pulled in to the marina was stop into the service center and make them aware of the situation and that I was going to try cleaning it myself since I knew Nemesis would be giving a call there later that day.  The guys in the building were super nice and helpful with information and possible solutions for our problem.  One even said he would walk out with me to take a look at the ‘damage’.  Unlocking the ladder from our cradle he leaned it against the boat and climbed on deck to have a look at the two boats.  After standing up there for a few seconds he glanced down at me and said, ‘What dust?  I don’t see anything on either boat.’.  I explained it was a thin covering that looked like dirt and was on the cockpit and deck.   He verified that he still wasn’t seeing anything and invited me up to take a look.  When I was on our deck everything did in fact appear clean.  There had been rain the previous night and it must have washed everything off.

Upon closer inspection there were still a few small dots on the fiberglass if you looked really close.  The service guy said everything looked good enough to him and stepped down the ladder to go back to work.  That made me feel so much better because even if a call were placed to the marina that day I had someone on the inside to back me up.  Still wanting to make everything as clean and shiny as possible I pulled out my rags and started giving both boats a good wipe down.  When I finished, to me, they looked cleaner than they had before any sanding had even started.  I texted Matt that everything was ok and he didn’t have to keep stressing himself into a heart attack, we’ve lived to fight another day.

Let the Sanding Commence

Friday October 21, 2011

In our attempt to get Serendipity ready for a trip around the world, or at least a few thousand miles down to the Caribbean, we want to give her the best treatment possible.  A boat spa perhaps where everything is updated, polished, cleaned and prettied up.  This includes getting her to a bare bottom so we can start fresh with the paint next year instead of adding layer on top of layer to the old one which is usually what happens.  While some people will do this by hand scraping alone which I can imagine would be torture, we were doing a combination of hand scraping and power sanding.  I had taken a day off work and we figured that between the two of us working two days this week and two days next week we could finish this project and leave the hull bare all winter before applying a fresh coat of sea-worthy paint before it hits the water in spring.

We had two sanders to work with that day, a large 6″ Porter Cable for Matt and a smaller 5″ Makita for me.  Although after getting the tarp down near the bow of the Starboard side, running the extension cords and hooking into the wet/dry vac we turned on our sanders and found there was not enough power for both of us to be working with the power sanders.  Since we both knew Matt could do more damage with a sander than I could he continued to work from the bow back while I picked up one of the hand scraping tools and started just behind him.  I found that it was nearly impossible for me to get down to bare hull using that tool alone, even the few moments I was able to put my full force behind it.  I didn’t want to give up that early in the day and leave Matt with all the work to do alone so I kept scraping off as much as I could going from the dark gray color on top to a bright orange that was below it.

Work was already going a little slower for Matt than he expected, even with the power sander.  He was using 80 grit sandpaper to try and keep as smooth of a finish as possible but it was also making the work go impossibly slow.  It seemed like there were a million layers of paint to get through and the sander was not going from gray to white right away like he expected.  I was hoping that when he got to my area it would be easier and quicker for him since I’d already gotten a few layers in.  Once he did get to a spot I’d been working on he said it did help and that it didn’t take as long to get to bare hull on the area I’d scraped vs the one I hadn’t.  Feeling like I did have a purpose out there I began scraping with a fury just to make sure I was always ahead of him.

After working a good six hours I had scraped nearly 1/3 of the starboard side while Matt had sanded close to 1/4 down to bare hull.  So maybe this won’t be a two weekend project after all.  Hopefully November won’t be too cold and we can get a few Sundays out here to finish it so this project doesn’t run into spring and we can focus on all the other things that need to be done.

Matt’s working hard

And I’m trying to (I actually did get much further through the layers than this)